

A sheet cake is a versatile and popular dessert for celebrations, offering large portions with minimal effort. However, cutting it evenly can be challenging without proper techniques. This guide provides essential methods and tips to ensure perfectly sized slices and a professional presentation, making your events memorable and stress-free.
1.1 Importance of Proper Cutting Techniques
Proper cutting techniques are essential for achieving even, visually appealing slices and minimizing waste. A well-cut sheet cake ensures consistent portion sizes, making it easier to serve guests evenly. Improper cutting can lead to uneven slices, which may result in some pieces being too large or too small, affecting both presentation and guest satisfaction. Additionally, proper techniques help maintain the cake’s structural integrity, preventing it from breaking or crumbling. Whether for a casual gathering or a formal event, mastering cutting techniques enhances the overall dining experience and showcases attention to detail. This skill is invaluable for both professional bakers and home cooks alike.
1.2 Brief Overview of Sheet Cakes
A sheet cake is a large, flat rectangular dessert baked in a single pan, typically measuring 18×24 inches or smaller. It’s ideal for serving crowds due to its generous portion sizes. Sheet cakes are versatile, often used for birthdays, weddings, and corporate events. They can be customized with various flavors, frostings, and decorations. Unlike layered cakes, sheet cakes are simpler to prepare and serve, making them a practical choice for both casual and formal gatherings. Their uniform thickness ensures even baking and cutting, while their flat surface allows for creative designs. This makes sheet cakes a popular option for celebrating any occasion efficiently and elegantly.
Tools and Equipment Needed
A sharp knife, small spatula, and cutting guide are essential for precise cuts. Optional tools include dental floss for even slices and specialized knives for advanced techniques.
2.1 Essential Tools for Cutting
To achieve clean, even slices, a sharp knife is indispensable. A long, thin blade works best for straight cuts, while a serrated knife helps with frosted cakes. A small spatula is handy for serving slices without breaking them. Scoring the cake with a butter knife or spatula creates guidelines, ensuring uniform portions. Optional tools like dental floss can be used for precise, even cuts, especially for layered cakes. Having these tools ready simplifies the cutting process, making it efficient and stress-free. Proper equipment ensures your sheet cake is served neatly and professionally, impressing your guests with both taste and presentation.
2.2 Optional Tools for Advanced Techniques
For advanced techniques, consider using dental floss for precise, even slices, especially for layered cakes. A cake turntable allows easy access to all sides, making uniform cuts simpler. A cake level ensures the surface is even, preventing uneven slices. Optional tools like a pastry cutter or cake slicer can help create uniform portions quickly. These tools enhance precision and presentation, ideal for professional results. While not essential, they offer versatility for intricate designs or large events, ensuring your sheet cake looks as good as it tastes. Investing in these tools elevates your cake-cutting skills, making the process efficient and visually appealing.
Basic Techniques for Cutting a Sheet Cake
Mastering basic techniques ensures even, professional-looking slices. Start by scoring the cake to guide your cuts, then use a sharp knife to slice cleanly through, following the grid method for uniform portions.
3.1 The Grid Method
The grid method is a straightforward technique for cutting sheet cakes evenly. Begin by lightly scoring the cake’s surface with a knife or spatula, dividing it into equal sections. For a standard grid, make parallel vertical and horizontal cuts, spacing them evenly based on the desired portion size. This creates a grid pattern, guiding precise slices. Use a long, sharp knife to cut along the scored lines, ensuring clean, uniform pieces. This method is ideal for large gatherings, as it allows for consistent serving sizes and a visually appealing presentation. It’s simple, efficient, and ensures every guest gets an equal share.
3.2 Scoring the Cake
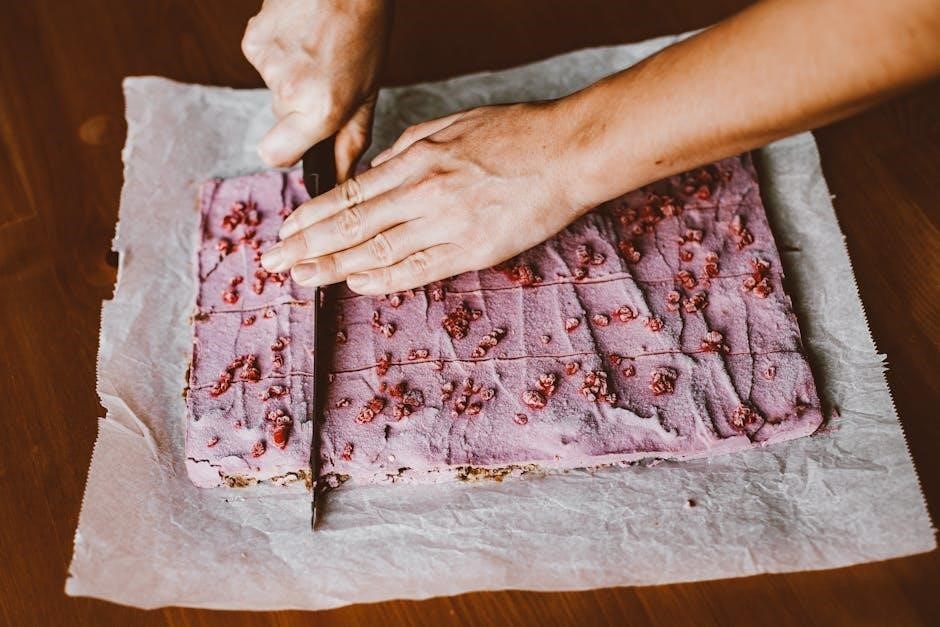
Scoring the cake is a preliminary step that ensures clean, even cuts. Using a sharp knife or spatula, lightly mark the cake’s surface with guidelines where you plan to make cuts. This step helps maintain control and prevents the cake from tearing. For uniform slices, score the cake into equal sections, either by measuring or estimating. Scoring also allows for precise alignment when cutting, especially when using methods like the grid technique. It’s a simple yet effective way to achieve professional-looking results. By scoring first, you can confidently make smooth, straight cuts, ensuring every slice is consistent in size and appearance.
3.3 Cutting Evenly Sized Pieces
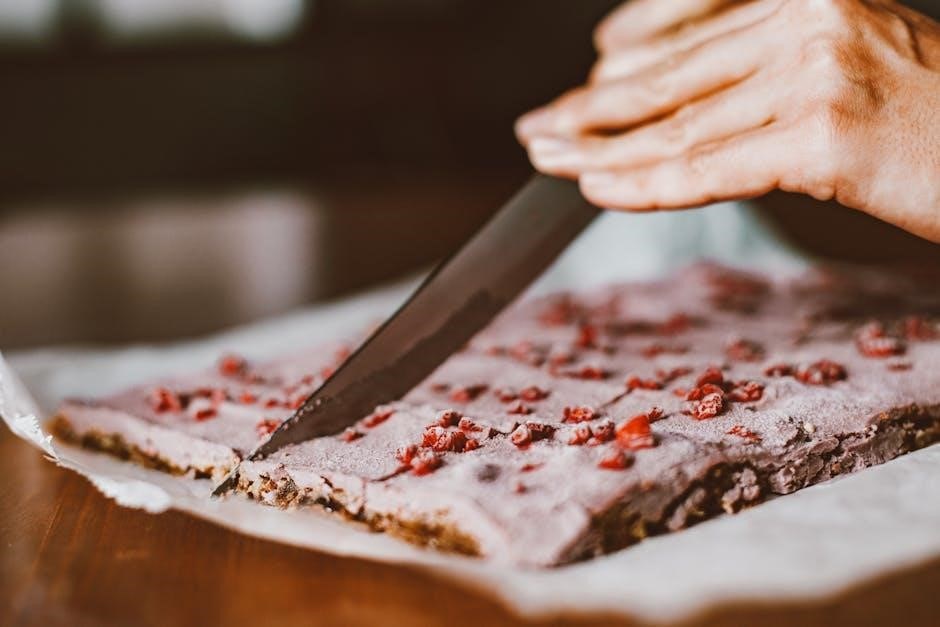
Cutting evenly sized pieces from a sheet cake requires precision and consistency. Start by scoring the cake to create guidelines, then use a sharp knife to make clean cuts along these lines. For uniform slices, measure the cake’s dimensions and divide it into equal sections. Use a ruler or measuring tape for accuracy. Apply gentle, even pressure, and cut in a smooth, sawing motion to avoid tearing. Wipe the knife between cuts to remove excess frosting or crumbs. This method ensures each piece is identical in size, making it ideal for events where presentation matters. Evenly sized slices also make serving easier and more efficient.
Advanced Cutting Techniques
Master advanced techniques like cutting into layers, creating unique shapes, and using tools like dental floss for precise slices. These methods add creativity and professionalism to your sheet cake presentation, ensuring impressive results for any occasion.

4.1 Cutting into Layers
Cutting a sheet cake into layers requires precision and the right tools. Start by placing the cake on a sturdy surface or turntable. Use a long, serrated knife to make horizontal cuts, ensuring even thickness. For multiple layers, repeat the process, using a cake leveler if needed; To achieve smooth cuts, apply gentle pressure and maintain a steady hand. Optional tools like cake saws or wire cutters can help with intricate designs. Always let the cake cool completely before cutting to prevent crumbling. This technique is ideal for creating multi-tiered desserts or adding fillings between layers for enhanced flavor and presentation.
4.2 Creating Unique Shapes
Creating unique shapes from a sheet cake adds a personal touch to any celebration. Use a sharp knife or cookie cutters to carve intricate designs, such as hearts, stars, or custom shapes. For clean cuts, chill the cake in the freezer for 10 minutes to firm it up. Trace the desired shape with a toothpick or knife lightly before cutting. Free-hand cutting allows for creative freedom, while templates ensure precision. Dental floss can also be used for smooth, straight lines. This technique is perfect for themed events or personalized desserts, making your sheet cake stand out with artistic flair and visual appeal.
4.3 Using Dental Floss for Even Slices
Dental floss is a surprising yet effective tool for cutting sheet cakes into even slices. By stretching a long piece of floss taut, you can create clean, straight cuts with minimal effort. Simply press the floss down gently and slice through the cake in a smooth, consistent motion. This method works particularly well for large cakes, ensuring uniform portions. Wipe the floss clean between cuts to avoid transferring frosting or debris. Dental floss is especially useful for achieving precise, even slices without the need for specialized tools, making it a practical solution for both casual gatherings and formal events.
Tips for Achieving Perfect Slices
Use a sharp knife, score the cake first, and stabilize it on a flat surface. These steps ensure clean cuts and evenly sized slices every time.
5.1 Ensuring Sharp Knives
A sharp knife is essential for achieving clean, even cuts when slicing a sheet cake. Dull knives can tear the cake, leading to uneven slices and a messy appearance. To ensure your knife stays sharp, regularly sharpen it using a whetstone or sharpening tool. Before cutting, lightly run the blade across a sharpening steel to maintain its edge. Additionally, wipe the knife with a clean cloth or paper towel between cuts to remove excess frosting or crumbs, which can dull the blade over time. A well-maintained knife will make the cutting process smoother and result in professional-looking slices.
5.2 Maintaining Cake Stability
Maintaining cake stability is crucial for clean, even cuts. Place the sheet cake on a sturdy, flat surface or cake stand to prevent wobbling. If the cake is in a pan, ensure it’s securely positioned. For added stability, chill the cake in the refrigerator for about 10 minutes before cutting, as a firmer texture is easier to handle. Use a long, thin knife or serrated blade to make precise cuts, and consider using a spatula to support the cake during slicing. Avoid applying too much pressure, which can cause the cake to break or shift. A stable cake ensures consistent slices and a professional presentation.
5.3 Avoiding Common Mistakes
When cutting a sheet cake, common mistakes can lead to uneven slices or damaged cake. One major error is using a dull knife, which can tear the cake instead of cutting cleanly. Another mistake is cutting too quickly or applying too much pressure, causing the cake to break or shift. Failing to score the cake before making final cuts can also result in uneven portions. Additionally, not wiping the knife between cuts can spread frosting unevenly and make slices appear messy. To avoid these issues, use a sharp knife, score the cake first, and cut slowly and gently. This ensures clean, even slices and a professional presentation.
Portion Sizes and Servings
Sheet cakes offer flexibility in portion sizes, from standard 2×2-inch slices to event-style servings. Customizable cuts allow you to tailor sizes for specific gatherings, ensuring every guest is satisfied.
6.1 Standard Portion Sizes
Standard portion sizes for sheet cakes typically range from 2×2 inches to 2×3 inches, ensuring consistent servings. A full sheet cake (18×26 inches) yields 24-32 slices, while a half sheet (13×18 inches) serves 12-16. These sizes are ideal for events, providing balanced portions without waste. To achieve even cuts, use a sharp knife and score the cake first. This method ensures clean, uniform slices. For larger gatherings, 2×2-inch pieces are recommended, while smaller events may opt for 2×3-inch servings. Maintaining standard sizes ensures fairness and satisfaction for all guests, making it easier to plan and serve efficiently.
6.2 Event-Style Servings
Event-style servings for sheet cakes are designed to accommodate large gatherings, offering a practical solution for uniform portioning. A standard approach is to cut the cake into 2×2-inch or 2×3-inch slices, ensuring consistent sizes for guests. For a full sheet cake (18×26 inches), this yields 24-32 servings, while a half sheet (13×18 inches) provides 12-16 servings. To achieve clean cuts, score the cake lightly with a knife before slicing. This method prevents crumbling and ensures even distribution. Event-style servings are ideal for weddings, parties, or corporate functions, where efficiency and presentation are key. Proper portioning enhances the overall experience, making it easy to serve a crowd.
6.3 Customizing Portion Sizes
Customizing portion sizes for sheet cakes allows flexibility to suit different events or preferences; For smaller gatherings, slices can be cut into 1×2-inch pieces, while larger events may require 3×3-inch servings. To achieve this, score the cake lightly with a knife to mark desired sizes before cutting. Using a sharp knife ensures clean, even slices. For unique needs, such as kid-friendly portions or special dietary requirements, adjust slice dimensions accordingly. This method ensures every guest receives a consistent and appropriately sized piece, enhancing satisfaction and presentation. Customization makes sheet cakes adaptable to any occasion, from intimate gatherings to grand celebrations. Proper tools and techniques are key to success.

Serving and Presentation
Serving and presenting a sheet cake elegantly enhances its appeal. Arrange slices neatly on a platter, garnish with fresh fruits or frosting designs, and maintain freshness by storing leftovers properly.
7.1 Arranging Slices on a Platter
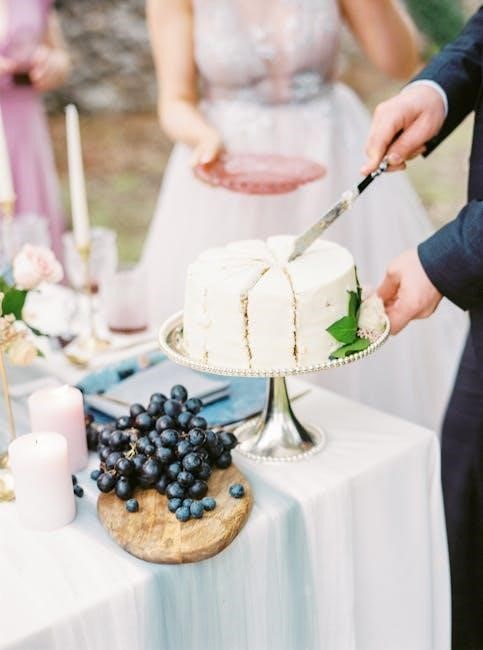
Arranging sheet cake slices on a platter requires attention to detail for an appealing presentation. Start by placing the largest slices at the back and smaller ones in front, creating a balanced look. Alternate the orientation of slices to add visual interest. Use garnishes like fresh fruits, edible flowers, or frosting designs to enhance the platter’s appearance. Ensure symmetry by distributing slices evenly, leaving minimal gaps. For a professional touch, place a few slices upright or fan them out slightly. This method ensures a visually appealing and inviting display, making the cake a centerpiece of any event or celebration.
7.2 Garnishing the Cake

Garnishing a sheet cake elevates its visual appeal and adds a personal touch. Fresh fruits like strawberries, blueberries, or raspberries are popular choices, offering both color and flavor. Edible flowers or sprinkles can add elegance, while chocolate shavings or nuts provide texture. For a clean look, dust the cake with powdered sugar or create a border with frosting. Garnishes should complement the cake’s theme and occasion, ensuring a cohesive presentation. Experiment with patterns or designs to make the cake stand out. Proper garnishing enhances the cake’s attractiveness, making it a centerpiece for any event or celebration.
7.4 Maintaining Cake Freshness
Maintaining the freshness of a sheet cake is crucial for optimal flavor and texture. Store the cake in an airtight container at room temperature for up to 2 days or refrigerate for up to 5 days. Wrap the cake tightly in plastic wrap or aluminum foil to prevent drying out. For longer storage, consider freezing the cake, ensuring it’s wrapped securely to avoid freezer burn. When serving, allow refrigerated or frozen slices to reach room temperature for the best taste. Regularly check for signs of staleness or spoilage, such as dryness or an off smell, to ensure quality.
Specialized Cutting Methods
Explore advanced techniques like wedge-shaped servings, triangular cuts, and free-hand slicing for unique presentations. These methods ensure even slices and visually appealing results for any occasion.
8.1 Wedge-Shaped Servings
Wedge-shaped servings offer a classic and elegant way to portion a sheet cake. To achieve this, start by scoring the cake into equal sections using a sharp knife or spatula. For a standard 18×26-inch sheet cake, cut 3×8 strips, then slice diagonally through each strip to create triangular wedges. This method yields 48 uniform servings. Ensure your knife is sharp to maintain clean cuts and even sizes. Using a spatula to guide the knife can help achieve precise angles. This technique is ideal for events requiring consistent portion sizes and visually appealing slices, making it a favorite for both casual gatherings and formal celebrations.
8.2 Triangular-Shaped Servings
Triangular-shaped servings add a touch of elegance to any event. To achieve this, start by cutting the sheet cake into long, even strips. For a standard 18×26-inch cake, cut 8×8 strips to yield 64 servings. Next, slice each strip diagonally to create triangular pieces. Use a sharp knife and spatula for clean cuts. This method ensures uniform sizes and visually appealing slices. Triangular servings are ideal for formal gatherings, as they offer a sophisticated presentation. To maintain freshness, consider cutting only what’s needed and storing the rest. This technique is perfect for events requiring both style and efficiency in serving.
8.3 Free-Hand Cutting Techniques
Free-hand cutting offers flexibility for unique portion sizes and shapes. Start by cutting the cake into large sections, then divide those into smaller pieces. For consistency, cut from the center outward, using a sharp knife and spatula; This method is ideal for irregular shapes or when precise measurements aren’t required. To maintain evenness, cut in a steady, smooth motion. Free-hand techniques are perfect for casual gatherings or when serving sizes vary. They allow for creativity and adaptability, making them a great option for those who prefer a more relaxed approach to cake cutting. This method ensures every guest gets a satisfying portion.
Mastering sheet cake cutting ensures even slices and a professional presentation. With proper techniques and tools, you can achieve perfect results every time, impressing your guests effortlessly.
9.1 Summary of Key Points
Proper sheet cake cutting involves essential techniques like the grid method, scoring, and using sharp tools. Portion sizes vary from standard to event-style servings, ensuring even distribution. Dental floss can aid in precise cuts, while maintaining cake stability prevents breaks. Avoiding common mistakes, like dull knives, ensures clean slices. Presentation tips, such as arranging slices neatly and garnishing, enhance appeal. Customizing portion sizes and using specialized methods like wedge or triangular cuts offer versatility. By mastering these strategies, you can achieve professional-looking results, making every occasion memorable. Sharp knives, patience, and practice are key to perfecting the art of sheet cake cutting.
9.2 Final Tips for Successful Cake Cutting
For flawless sheet cake cutting, always use a sharp knife and score the cake first to guide your cuts. Maintain even pressure and wipe the knife between slices to prevent frosting buildup. Ensure the cake is stable on a flat surface to avoid shifting. For precise portions, plan your cuts in advance and consider using dental floss for smooth, even slices. Clean your knife frequently to prevent crumbs from affecting the cut quality. Finally, practice patience and take your time, as rushed cuts often lead to uneven pieces. These final tips will help you achieve professional-looking results every time.