
Welcome to the Morse Sewing Machine Manual. This comprehensive guide covers setup, threading, bobbin winding, and maintenance, ensuring optimal performance for both beginners and experienced sewists. Master your machine with ease and confidence.
Key Features of the Morse Sewing Machine
The Morse Sewing Machine is renowned for its durability, versatility, and user-friendly design. It features an automatic darner for seamless repairs and a variety of stitch options, including straight-stitch, zig-zag, and decorative patterns. The machine also includes a built-in buttonhole creator, allowing for professional-looking results. With its all-metal drive parts and lack of complex electronics, it ensures reliable performance and easy maintenance. Optional attachments, such as interchangeable cams, expand its functionality for specialized tasks. The machine’s robust construction and intuitive controls make it suitable for both beginners and experienced sewists. Its compatibility with various fabrics, from delicate cotton to heavy-duty materials, further enhances its versatility. The Morse Sewing Machine is a timeless choice for home sewing projects, offering precision and creativity in every stitch.
History and Evolution of the Morse Sewing Machine
The Morse Sewing Machine has a rich history dating back to its establishment as a trusted brand in the sewing industry. Known for its durability and innovative features, the machine has evolved over the years to meet the changing needs of sewists. Early models were celebrated for their simplicity and reliability, making them a favorite among home sewers. The introduction of models like the Fotomatic III 4300 and the Super Dial marked significant advancements, offering features such as automatic darning and precise stitch control. These machines quickly gained popularity for their versatility and ease of use. Over time, Morse incorporated new technologies, including zig-zag stitching and decorative stitch options, while maintaining its reputation for high-quality craftsmanship. The brand’s commitment to innovation has allowed it to remain relevant in a competitive market. Today, Morse Sewing Machines are sought after by both hobbyists and professionals, blending traditional reliability with modern functionality. Their enduring appeal lies in their ability to adapt to the evolving demands of sewing enthusiasts worldwide.
Parts and Accessories of the Morse Sewing Machine
The Morse Sewing Machine includes essential components like the sewing head, bobbin, and needle. Standard accessories such as extra needles, bobbins, and a dust cover are provided. Optional attachments like zig-zag cams enhance functionality, catering to diverse sewing needs.
Main Components of the Machine
The Morse Sewing Machine features a durable construction with key components designed for precision and ease of use. The sewing head houses the needle bar, take-up lever, and stitch regulator, ensuring consistent stitching. The handwheel allows manual control for precise fabric movement, while the motor provides smooth operation. The stitch length and width dials enable customization of stitches, and the tension dials adjust thread tightness for perfect seams. The presser foot holds fabric in place, and the bobbin area is easily accessible for winding and replacement. These components work together to deliver reliable performance, making the Morse Sewing Machine a versatile tool for various sewing projects.
Standard Accessories Included
The Morse Sewing Machine comes with a variety of standard accessories to enhance your sewing experience. These include multiple bobbins for easy thread management, a set of sharp and heavy-duty needles suitable for different fabrics, and a selection of presser feet such as the all-purpose foot, zipper foot, and buttonhole foot. Additionally, the machine is equipped with a threader to simplify the threading process and a seam ripper for correcting mistakes. A soft dust cover is also provided to protect the machine when not in use. The package includes a comprehensive user manual that guides you through setup, operation, and maintenance. These accessories ensure you have everything needed to start sewing right away, whether working on basic projects or more complex designs. The inclusion of these essentials makes the Morse Sewing Machine a complete and versatile tool for sewists of all skill levels.
Optional Attachments for Enhanced Functionality
To expand the capabilities of your Morse Sewing Machine, several optional attachments are available. These include specialized stitch cams that allow for intricate patterns and decorative stitching, such as intricate zig-zag designs or custom embroidery-like effects; Additionally, an automatic darner attachment can be purchased for professional-grade darning and mending of fabrics. For quilting enthusiasts, a quilting guide or extension table can be added to provide a larger work surface and better control over large fabric pieces. Some models also support a walking foot attachment, ideal for sewing thick or layered fabrics like denim or leather. These optional attachments are designed to enhance your sewing experience, offering more versatility and precision for advanced projects. They can be purchased separately from authorized Morse dealers or sewing supply stores, ensuring compatibility with your specific machine model. By investing in these attachments, you can unlock the full potential of your Morse Sewing Machine and tackle a wider range of sewing tasks with ease and professionalism.
Setting Up Your Morse Sewing Machine
Setting up your Morse Sewing Machine involves threading, bobbin winding, and needle replacement. Ensure proper tension adjustment for smooth operation. Follow the manual’s step-by-step guide to prepare your machine for sewing, ensuring optimal performance and versatility for various projects.
Threading the Machine: A Step-by-Step Guide
Threading your Morse Sewing Machine is essential for smooth operation. Begin by turning off the machine and locating the spool pin. Gently pull the thread from the spool, guiding it through the machine’s tension discs. Follow the manual’s diagram to ensure proper routing. Loop the thread around the take-up lever and insert it into the needle’s eye. Pull the thread gently to remove any slack. Always refer to your specific model’s manual for precise instructions, as variations may exist. Proper threading ensures even stitch quality and prevents mechanical issues. If unsure, consult online resources or video tutorials for visual guidance. Regularly check thread tension to maintain optimal sewing performance. This step is crucial for both beginners and experienced users to achieve professional results. By following these steps, you can ensure your machine runs smoothly and efficiently for all your sewing projects.
Winding the Bobbin Correctly
Winding the bobbin is a critical step for smooth sewing with your Morse Sewing Machine. Begin by turning off the machine and ensuring the presser foot is raised. Place the bobbin on the bobbin winder, aligning the notch with the pin. Thread the machine as usual, leaving a small tail. Gently hold the thread and press the foot pedal to start winding. Stop when the bobbin is about 80% full to avoid overfilling. Trim the excess thread, leaving a short tail. Remove the bobbin and insert it into the bobbin case, ensuring it rotates smoothly. Always use the correct type of thread for your fabric to prevent issues. If the bobbin is overfilled or improperly wound, it may cause uneven stitching or machine jamming. For precise guidance, refer to your specific model’s manual or online tutorials. Proper bobbin winding ensures consistent stitch quality and prevents common sewing problems. This step is essential for both beginners and experienced users to achieve professional results. By following these steps, you can ensure your machine runs smoothly and efficiently for all your sewing projects.
Replacing the Needle Safely
Replacing the needle on your Morse Sewing Machine is a straightforward process that requires attention to detail to ensure safety and proper function. Always turn off the machine and unplug it before starting. Locate the needle clamp screw, usually found near the needle bar. Loosen the screw using the provided screwdriver, then carefully pull the old needle downward to remove it. Insert the new needle with the flat side facing the correct direction (refer to your manual for specific orientation). Tighten the needle clamp screw firmly to secure it in place. Avoid over-tightening, as this could damage the machine. If the needle is not aligned properly, it may cause uneven stitching or breakage. Always handle the needle with care, as it is sharp. For optimal performance, replace the needle regularly, especially if you notice signs of wear or after completing large projects. Proper needle replacement ensures smooth operation and prevents potential damage to your machine. This simple maintenance step is crucial for achieving professional results in your sewing projects. By following these steps, you can ensure your machine runs efficiently and safely. Regular needle changes are essential for maintaining stitch quality and overall machine performance.

Basic Sewing Operations with the Morse Machine
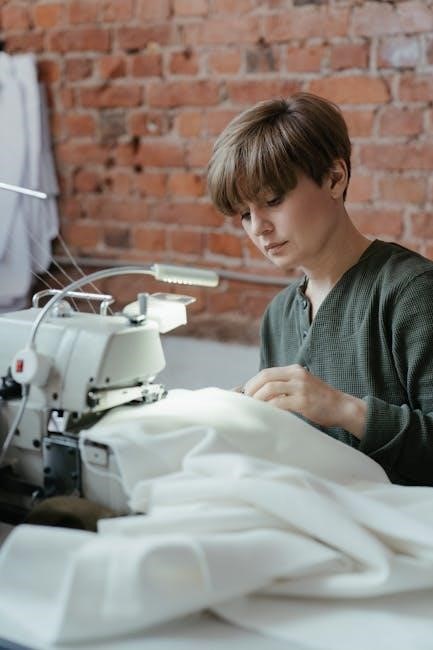
Master the fundamentals of sewing with the Morse Machine. Start by threading the machine and winding the bobbin correctly. Choose the right stitch type for your fabric and project. Begin with a straight stitch for simplicity, then explore zig-zag and decorative options. Always guide fabric smoothly and maintain consistent tension for professional results. Regularly check and adjust thread tension to prevent issues. Practice on scrap fabric to ensure settings are correct. For delicate fabrics, use a lighter touch, while heavier materials may require a denser stitch. Keep the machine well-oiled and clean to ensure smooth operation. By following these steps, you can achieve precise and professional-looking stitches every time. This guide provides a solid foundation for all your sewing projects, helping you unlock the full potential of your Morse Sewing Machine.
Starting Your First Sewing Project
Embark on your sewing journey with the Morse Sewing Machine by starting a simple project. Begin by familiarizing yourself with the machine’s basic functions and controls. Ensure the machine is properly threaded and the bobbin is correctly wound. Choose a straightforward project, such as sewing a straight line on scrap fabric, to practice your technique. Select the straight stitch option for this exercise, as it is ideal for beginners. Place the fabric under the presser foot, aligning the edge with the machine’s guide. Gently hold the fabric steady and begin sewing at a moderate speed. Always keep your hands away from the needle to avoid accidents. Once comfortable with straight stitching, gradually experiment with zig-zag and decorative stitches for more creative projects. Remember to adjust thread tension as needed and refer to the manual for guidance. Don’t hesitate to take breaks if overwhelmed—patience is key to mastering the machine. With practice, you’ll soon create professional-looking results and unlock the full potential of your Morse Sewing Machine.
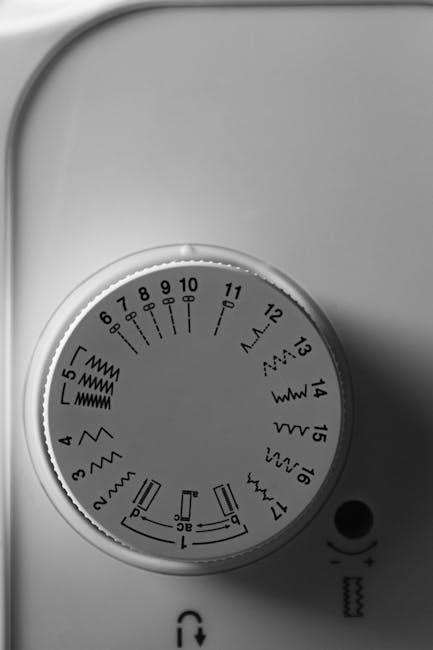
Selecting the Right Stitch Types
Selecting the appropriate stitch type is crucial for achieving professional results with your Morse Sewing Machine. The machine offers a variety of stitches, including straight, zig-zag, and decorative options, each designed for specific tasks. For general sewing, the straight stitch is ideal for straight lines and seaming. The zig-zag stitch is perfect for stretchy fabrics, preventing tears and providing flexibility. Decorative stitches add a creative touch, suitable for embellishing projects like curtains or clothing.
To choose the right stitch, consider the fabric type and project requirements. For delicate materials, use a shorter stitch length, while thicker fabrics may need longer stitches. Adjust the stitch width for zig-zag and decorative patterns to ensure proper coverage. Always test the stitch on scrap fabric before sewing your final piece. This ensures the settings are correct and prevents mistakes. By mastering the stitch selection, you can enhance the quality and versatility of your sewing projects with the Morse Sewing Machine.
Working with Various Fabrics Effectively
Working with different fabrics requires adjusting your Morse Sewing Machine settings to ensure optimal results. Start by identifying the fabric type, as this determines the appropriate needle size, thread weight, and stitch selection. For lightweight fabrics like cotton or silk, use a sharp needle and a shorter stitch length to prevent tearing. Heavier fabrics, such as denim or canvas, require a heavier-duty needle and longer stitches for strength.
Knit fabrics benefit from the zig-zag stitch to allow stretch, while delicate materials like chiffon or lace may need a specialized foot or a reduced tension setting. Always test your settings on scrap fabric before sewing your final project. This ensures the machine is properly calibrated for the fabric, avoiding puckering or uneven stitching.
By adjusting the machine’s settings and using the right accessories, you can achieve professional-quality results across a wide range of fabrics. Experiment with different combinations to master the unique demands of each material and expand your sewing capabilities with the Morse Sewing Machine.
Maintenance and Care of the Morse Sewing Machine
Regular maintenance ensures your Morse Sewing Machine performs optimally. Clean and oil the machine frequently, check for wear on parts, and store it properly. Follow the manual’s guidelines for lubrication and adjustment to extend its lifespan and reliability.
Cleaning the Machine Regularly
Regular cleaning is essential to maintain the performance and longevity of your Morse Sewing Machine. Start by turning off and unplugging the machine for safety. Use a soft, dry cloth to wipe down the exterior, removing dust and debris. For the interior, a small, dry brush or compressed air can gently sweep away lint and thread remnants from the bobbin area, tension discs, and stitch plate.
Avoid using harsh chemicals or liquids, as they may damage the machine’s finish or internal components. Instead, focus on mechanical cleaning. Pay special attention to the bobbin case and feed dogs, as these areas tend to accumulate the most lint. If you notice stubborn buildup, a slightly damp cloth can be used sparingly, but ensure the machine is completely dry before use.
For more thorough maintenance, refer to the manual for guidance on removing the stitch plate or other accessible parts. Regular cleaning prevents dust and lint from interfering with the machine’s mechanisms, ensuring smooth operation and consistent stitching. By incorporating this routine into your sewing practice, you’ll keep your Morse Sewing Machine in excellent working condition for years to come.
Oiling and Lubricating the Machine
Regular oiling and lubrication are crucial for maintaining the smooth operation and longevity of your Morse Sewing Machine. Always use the type of oil recommended in the manual, typically a high-quality sewing machine oil, to avoid damaging the internal components.
Start by locating the oil ports, usually found near the bobbin area or on the machine’s side. Drip a few drops of oil onto the moving parts, such as the handwheel gears, shuttle hook, and tension discs. Gently turn the handwheel to distribute the oil evenly throughout the mechanism.
Avoid over-lubrication, as excess oil can attract dust and lint, leading to clogged parts. After oiling, run the machine without fabric for a few minutes to ensure the oil is fully absorbed. For best results, oil the machine after cleaning or every 50 hours of use, depending on usage frequency.
Proper lubrication ensures that all mechanical components work seamlessly, reducing friction and preventing wear. By following these steps, you’ll keep your Morse Sewing Machine running smoothly and extend its lifespan. Regular maintenance is key to optimal performance and trouble-free sewing experiences.
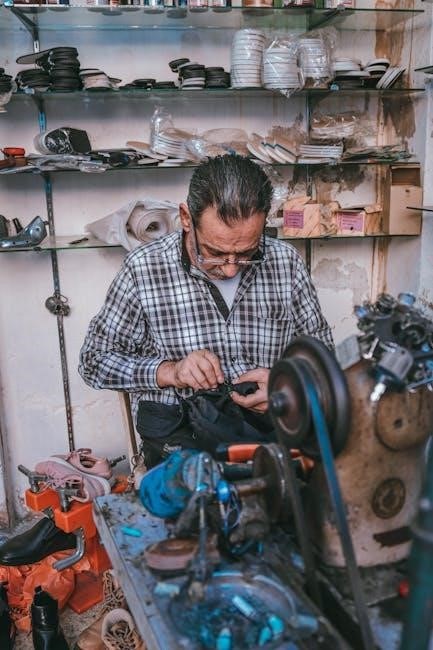
Troubleshooting Common Issues
Encountering issues with your Morse Sewing Machine can be frustrating, but most problems are easy to resolve with basic troubleshooting. One common issue is thread bunching or uneven stitching, often caused by incorrect threading or improper tension settings. To fix this, rethread the machine following the manual’s guide and adjust the tension discs to ensure balanced stitch formation.
Another frequent problem is the machine jamming or refusing to sew. This is often due to a full or improperly wound bobbin. Remove the bobbin, ensure it is wound correctly, and reinsert it according to the manual’s instructions. If the issue persists, check for tangled thread or debris in the bobbin area and clean it thoroughly.
For mechanical issues, such as the machine not turning on or the handwheel being stiff, ensure the power cord is securely connected and the machine is properly oiled. If the handwheel is stiff, apply a few drops of sewing machine oil to the moving parts and gently rotate it to loosen the mechanism.
Regular maintenance, such as cleaning and lubricating the machine, can prevent many of these issues. Refer to the manual for specific troubleshooting steps tailored to your Morse Sewing Machine model. By addressing problems promptly, you can ensure smooth and efficient sewing experiences.
Advanced Features and Techniques
Unlock your creativity with the Morse Sewing Machine’s advanced features, including professional buttonhole creation and mastering zig-zag stitching. Explore decorative stitches and optional attachments like cams for intricate designs, enhancing your sewing projects with precision and flair.
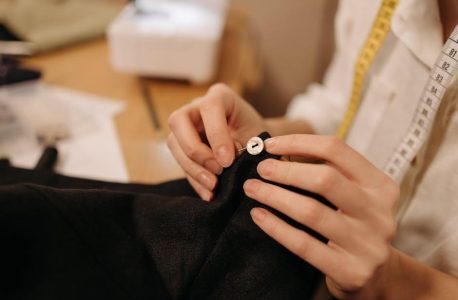
Creating Professional Buttonholes
Creating professional buttonholes is a breeze with the Morse Sewing Machine. The machine features an automatic buttonhole function, allowing you to craft consistent and precise buttonholes with minimal effort. To begin, ensure your fabric is properly stabilized and aligned. Use the buttonhole attachment provided with your machine, which helps guide the fabric smoothly during the stitching process.
Select the buttonhole stitch type on your machine, and adjust the settings according to the size of your buttons. The machine will automatically sew a perfect buttonhole, complete with a bartack at each end for durability. For custom-sized buttonholes, refer to your manual for specific measurements and adjustments.
Practice on scrap fabric to achieve the desired results before working on your final project. This ensures a professional finish every time. With the Morse Sewing Machine, you can create buttonholes that elevate your sewing projects, from garments to home decor, with ease and precision.
Mastering Zig-Zag Stitching and Decorative Stitches
The Morse Sewing Machine offers a variety of stitch options, including the popular zig-zag stitch and decorative patterns, to enhance your sewing projects. To master zig-zag stitching, start by selecting the appropriate stitch type on your machine. Adjust the stitch width and length using the control dials to achieve the desired effect. For consistent results, use the zig-zag presser foot, which is designed to handle the side-to-side motion of the needle.
Decorative stitches can add a professional touch to your creations. Explore the machine’s built-in patterns, such as scallops, flowers, and geometric designs. To ensure even stitching, maintain a steady fabric flow and keep the machine at a moderate speed. Experiment with different thread colors and fabric types to highlight your stitches.
For advanced techniques, consider using the machine’s automatic darner for overlocking seams or attaching optional cams for specialized decorative patterns. Practice on scrap fabric to perfect your technique before applying it to your final project. With the Morse Sewing Machine, you can effortlessly create intricate designs and durable seams, taking your sewing skills to the next level.