
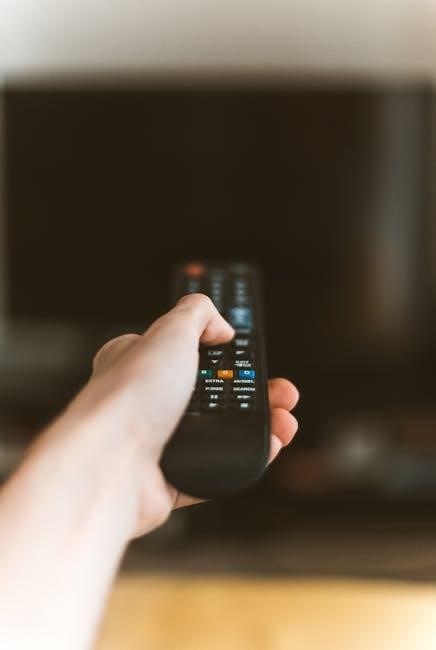
Welcome to the Mediacom Remote Control Manual. This guide helps users master their remote, covering setup, programming, and troubleshooting for models like DRC800 and Atlas, ensuring optimal performance.
1.1 Overview of the Mediacom Remote Control
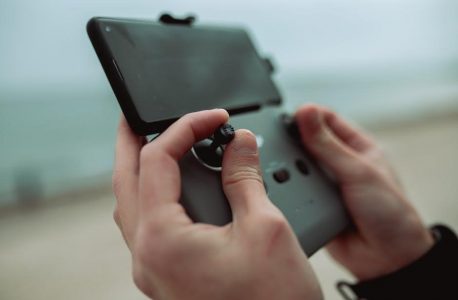
The Mediacom Remote Control is a universal device designed to streamline control over various media devices, including TVs, DVRs, and audio systems. It supports models like the DRC800, Atlas DVR, and Atlas OCAP, offering compatibility with Mediacom’s cable services. The remote features voice control, programmable buttons, and universal control capabilities, allowing users to customize their viewing experience. Its ergonomic design ensures comfort during extended use, while the intuitive layout simplifies navigation. The remote is equipped to handle multiple devices, making it a central hub for home entertainment systems. Regular updates and user-friendly features ensure it remains efficient and adaptable to evolving technology. This overview highlights the remote’s versatility and advanced functionalities, making it an essential tool for managing media devices seamlessly.
1.2 Importance of the Manual for Users
The Mediacom Remote Control Manual is a vital resource for users seeking to maximize their remote’s functionality. It provides detailed instructions for setting up, programming, and troubleshooting various Mediacom remote models, such as the DRC800 and Atlas series. Whether you’re a new user or an experienced one, the manual ensures you understand all features, from basic operations to advanced settings like voice control and programmable buttons. It helps resolve common issues, such as pairing problems or unresponsive buttons, and guides users in customizing their remote for a personalized experience. By following the manual, users can avoid frustration and ensure their remote operates efficiently. This guide is especially useful for those unfamiliar with universal remotes or looking to integrate their Mediacom remote with multiple devices seamlessly.
Understanding the Mediacom Remote Control Compatibility
The Mediacom remote is designed to work seamlessly with various devices, including TVs, DVRs, and audio systems. Its universal design ensures compatibility across multiple brands and models, enhancing user convenience.
2.1 Devices Supported by the Mediacom Remote
The Mediacom remote is compatible with a wide range of devices, ensuring seamless control over your entertainment and home systems. It supports various TV models, DVD players, audio systems, and DVRs. Specific models like the DRC800 and Atlas series are fully integrated for optimal performance. Additionally, the remote works with cable boxes, streaming devices, and soundbars, making it a versatile tool for modern home setups. Its universal design allows it to connect with multiple brands, providing users with a centralized control solution. Whether you’re adjusting the volume, changing channels, or accessing advanced features, the Mediacom remote simplifies your experience. This compatibility ensures that you can manage all your devices efficiently, enhancing your overall viewing and listening experience.
Setting Up the Mediacom Remote Control
Setting up your Mediacom remote involves unboxing, pairing, and syncing with your devices. Follow the manual for a smooth setup and optimal performance of your remote control.
3.1 Unboxing and Initial Setup
Unboxing your Mediacom remote is the first step to enjoying seamless control of your devices. Carefully open the packaging and ensure all components, including batteries and the remote itself, are included. Insert the provided batteries into the remote, ensuring correct polarity to avoid damage. Next, familiarize yourself with the remote’s layout, noting essential buttons for navigation, volume, and power. Before use, sync the remote with your Mediacom device by following the manual’s pairing instructions. This initial setup ensures proper functionality and compatibility. If you encounter issues, refer to the troubleshooting section for guidance. Proper unboxing and setup are crucial for optimal performance and a hassle-free viewing experience.
3.2 Pairing the Remote with Your Device
Pairing your Mediacom remote with your device is a straightforward process that ensures seamless control. Start by turning on your TV or other compatible device. Locate the pairing button on the remote, usually found under the battery compartment or on the side. Press and hold this button until the LED light on the remote blinks, indicating it is in pairing mode. Next, follow the on-screen instructions on your device to complete the pairing process. For specific models like the DRC800 or Atlas, refer to the manual for exact steps. Ensure the remote is in close proximity to the device during pairing. If issues arise, such as the remote not responding, restart the process or consult the troubleshooting section. Proper pairing ensures optimal functionality and a smooth user experience.
3.3 Syncing the Remote with Multiple Devices
Syncing your Mediacom remote with multiple devices enhances your viewing experience by allowing universal control. Start by ensuring the remote is paired with your primary device, such as your TV. For additional devices like DVD players or soundbars, use the remote’s settings menu to select the appropriate device type. Enter the specific codes provided in the manual or use the auto-detection feature, if available. For models like the DRC800 or Atlas DVR, this process may vary slightly. Once synced, test each button to ensure proper functionality. If issues occur, refer to the troubleshooting section or reset the remote. Regularly updating the remote’s firmware can also improve compatibility. Syncing multiple devices streamlines control, reducing clutter and simplifying entertainment management. Always consult the manual for model-specific instructions to ensure a seamless setup process.
Programming the Mediacom Remote Control
Programming your Mediacom remote allows you to control various devices seamlessly. Models like DRC800, Atlas DVR, and Atlas OCAP offer unique features. Customize buttons for personalized functions, enhancing your viewing experience.
4.1 Programming the DRC800 Model
Programming the DRC800 model of the Mediacom remote allows you to control multiple devices seamlessly. Start by turning on the device you want to control, such as your TV or DVD player. Press and hold the Setup button until the LED light blinks twice, then release it. Enter the specific code for your device using the number pad. If the code is correct, the LED will blink twice. Test the remote to ensure all buttons function properly. If the initial code doesn’t work, try entering an alternate code from the provided list. For devices without a predefined code, use the Search function to find the correct one automatically. Once programmed, the DRC800 can control up to four devices, enhancing your home entertainment experience. Refer to the manual for a full list of codes and troubleshooting tips if issues arise.
4.2 Programming the Atlas DVR Model
Programming the Atlas DVR model of the Mediacom remote enables seamless control of your DVR and other devices. Begin by turning on the device you wish to control, such as your DVR or TV. Press and hold the Setup button until the LED light blinks twice, then release it. Enter the specific code for your DVR using the number pad. If the code is correct, the LED will blink twice. Test the remote to ensure all buttons function properly. For devices without a predefined code, use the Search function to automatically find the correct code. Once programmed, the Atlas DVR remote can control multiple devices, streamlining your viewing experience. Refer to the manual for a full list of codes and troubleshooting tips if issues arise. Proper programming ensures optimal performance and convenience for your home entertainment system.
4.3 Programming the Atlas OCAP Model
Programming the Atlas OCAP model of the Mediacom remote allows for advanced control of your DVR and other devices. Start by turning on the device you want to control, such as your DVR or TV. Press and hold the Setup button until the LED light blinks twice, then release it. Enter the specific code for your OCAP device using the number pad. If the code is correct, the LED will blink twice. Test the remote to ensure all buttons function properly. The OCAP model supports advanced features like DVR controls and on-demand access. For devices without a predefined code, use the Search function to find the correct code automatically. Once programmed, the Atlas OCAP remote can seamlessly integrate with your home entertainment system, offering enhanced functionality and convenience. Refer to the manual for troubleshooting tips if issues arise during programming.
4.4 Customizing Buttons for Specific Functions
Customizing buttons on your Mediacom remote allows for a personalized experience, enabling you to assign specific functions to certain keys. To begin, access the remote’s customization feature by pressing and holding the Setup button until the LED light blinks twice. Use the number pad to enter the code corresponding to the function you wish to assign. For example, you can program the OK button to launch your favorite app or the Back button to navigate through menus more efficiently. Once programmed, test the buttons to ensure they perform the desired actions. If you encounter issues, reset the remote by pressing and holding the Setup and 0 buttons simultaneously for five seconds. Customization enhances usability, making your viewing experience more convenient and tailored to your preferences. Refer to the manual for a list of compatible codes and functions.
Advanced Features of the Mediacom Remote Control
Unlock the full potential of your Mediacom remote with advanced features like voice control, universal device management, and programmable buttons for a seamless and personalized entertainment experience.
5.1 Voice Control Functionality
The Mediacom remote offers advanced voice control functionality, allowing users to navigate and control their viewing experience hands-free. This feature is particularly useful for searching content, changing channels, and adjusting settings without needing to press physical buttons. To activate voice control, ensure your remote is properly paired with your device and that voice commands are supported. Simply press and hold the voice button, speak your command clearly, and release to execute; Common voice commands include changing channels, adjusting volume, or searching for specific shows or movies. Troubleshooting voice control issues may involve checking battery levels, ensuring the remote is paired correctly, and verifying that the microphone is not obstructed. This feature enhances convenience and accessibility, making it easier to enjoy your entertainment experience. Explore more voice command options in your Mediacom remote manual for optimal use.
5.2 Universal Control Capabilities
The Mediacom remote is designed to function as a universal control device, allowing users to manage multiple devices seamlessly. It supports a wide range of devices, including TVs, DVRs, audio systems, and more. This universal capability eliminates the need for multiple remotes, simplifying your entertainment setup. The remote can be programmed to control up to four devices, making it a convenient solution for home theaters or living rooms with various components. Compatibility extends to popular brands and models, ensuring a smooth integration with your existing equipment. By syncing the remote with your devices, you can enjoy a unified control experience, streamlining your interactions with all connected devices. This feature is particularly beneficial for users who want to simplify their viewing and listening experiences without the clutter of multiple controllers.
5.3 Programmable Buttons for Personalized Use
The Mediacom remote offers programmable buttons, allowing users to customize their viewing experience. These buttons can be set to perform specific functions tailored to individual preferences. For instance, users can assign buttons to control volume, change channels, or access favorite apps directly. This feature enhances convenience by reducing the need to navigate through multiple menus. The programmable buttons are particularly useful for frequently used functions, ensuring quick and easy access. Models like the DRC800 and Atlas DVR remotes support this customization, making it easy to adapt the remote to your unique needs. By personalizing the buttons, users can streamline their interaction with devices, creating a more intuitive and efficient control experience. This level of customization is a key advantage of the Mediacom remote, catering to diverse user preferences and enhancing overall satisfaction.
Troubleshooting Common Issues
This section addresses frequent problems with the Mediacom remote, such as pairing issues, unresponsive buttons, and battery drain. Follow the steps to resolve these common challenges effectively.
6.1 Resolving Pairing Issues
Pairing issues with your Mediacom remote can be frustrating but are often easy to fix. First, ensure the remote and device are in close proximity. Replace batteries if they are weak, as low power can disrupt pairing. Reset the remote by pressing and holding the TiVo and TV Power buttons until the activity indicator lights red. This un-pairs the remote, allowing you to start fresh. Next, re-pair the remote by following the on-screen instructions for your specific TiVo device. Ensure you are using the correct device codes for your equipment. If issues persist, check for interference from other devices or physical obstructions. Finally, consult the official Mediacom manual for model-specific troubleshooting steps. By following these steps, you can restore functionality and enjoy seamless control of your devices.
6.2 Fixing Unresponsive Buttons
If your Mediacom remote has unresponsive buttons, start by cleaning the remote thoroughly. Use a soft cloth and mild alcohol to wipe down the buttons and surface. Ensure no debris or obstructions are blocking the infrared sensor. Check for physical damage or wear on the buttons, as this can prevent proper functionality. Replace the batteries with fresh ones, as weak battery power can cause intermittent issues. If specific buttons remain unresponsive, try resetting the remote by pressing and holding the TiVo and TV Power buttons until the activity indicator lights red. This process may vary depending on your remote model. If the issue persists, consult the official Mediacom manual for model-specific troubleshooting steps or contact customer support for further assistance. Regular maintenance and proper care can help prevent such issues and ensure smooth operation.
6.3 Addressing Battery Drain Problems
If you notice your Mediacom remote control experiencing rapid battery drain, there are several steps to address the issue. First, ensure the battery contacts are clean and free from corrosion. Use a soft cloth to wipe them clean. Next, check if the remote is exposed to extreme temperatures, as this can affect battery performance. Replace the batteries with high-quality ones, ensuring they are properly aligned and securely fitted. Avoid mixing old and new batteries, as this can cause uneven drain. If the issue persists, consider using rechargeable batteries, which often provide more consistent power. Additionally, store the remote in a dry place when not in use to prevent moisture from affecting the batteries. Regularly replacing batteries and maintaining proper care can help extend their lifespan and ensure reliable performance.
6.4 Resetting the Remote to Factory Settings
Resetting your Mediacom remote to factory settings can resolve persistent issues or prepare it for a new user. To reset, press and hold the Menu and OK buttons simultaneously for 10-15 seconds until the LED light flashes red. Release the buttons and wait for the remote to restart. This process will erase all custom settings and pairings, restoring the remote to its original state. After resetting, you will need to re-pair the remote with your devices. If the issue persists, ensure the remote is fully reset by repeating the process. For additional guidance, refer to the official Mediacom manual or contact support. Resetting is a simple yet effective solution to restore functionality and ensure optimal performance.
Maintenance and Care Tips
Regularly clean the remote with a soft cloth, avoiding harsh chemicals. Replace batteries properly and store the remote in a dry, safe place to ensure longevity and optimal functionality.
7.1 Cleaning the Remote Control
Regular cleaning of your Mediacom remote control is essential to maintain its functionality and longevity. Use a soft, dry cloth to wipe down the remote, paying attention to the buttons and surfaces. For tougher stains or dirt buildup, dampen the cloth slightly with water, but avoid soaking it to prevent moisture damage. Never use harsh chemicals, abrasive cleaners, or alcohol, as these can damage the remote’s finish or harm its electronic components. Gently scrub any stubborn areas with a cotton swab. After cleaning, ensure the remote is completely dry before using it. This simple maintenance routine will keep your remote functioning smoothly and ensure optimal performance for years to come.
7.2 Replacing Batteries Properly
Replacing the batteries in your Mediacom remote control is a straightforward process that ensures uninterrupted functionality. Start by locating the battery compartment, typically found on the back or bottom of the remote. Open it by sliding the cover or using a small screwdriver, depending on the model. Remove the old batteries and dispose of them responsibly. Insert the new batteries, making sure to align the positive and negative terminals correctly. Avoid mixing old and new batteries, as this can reduce performance. Close the compartment securely and test the remote to ensure it works properly. If the remote fails to respond, check the battery alignment or try replacing the batteries again. Regular battery replacement is crucial for maintaining optimal performance and preventing unexpected shutdowns. Always use high-quality batteries to ensure reliable operation of your Mediacom remote control.
7.3 Storing the Remote Safely
Proper storage of your Mediacom remote control is essential to maintain its functionality and longevity. When not in use, store the remote in a dry, cool place away from direct sunlight or extreme temperatures. Avoid leaving it in areas prone to moisture, such as basements or bathrooms, as this can damage the internal components. Use a protective case or pouch to shield the remote from dust and physical damage. If storing for an extended period, remove the batteries to prevent corrosion. Keep the remote out of reach of children and pets to avoid accidental damage. Clean the remote before storage to ensure no dirt or debris interferes with its performance when reused. By following these steps, you can ensure your Mediacom remote remains in optimal condition for years to come.
Additional Resources and Support
Explore the official Mediacom manual, online support, and community forums for troubleshooting, tips, and comprehensive guides to enhance your remote control experience.
8.1 Accessing the Official Mediacom Manual
The official Mediacom Remote Control Manual is readily available on Mediacom’s website, providing detailed instructions for various remote models, including the DRC800, Atlas DVR, and Atlas OCAP. This comprehensive guide covers setup, programming, and troubleshooting, ensuring users can maximize their remote’s functionality. To access the manual, visit Mediacom’s official support page and navigate to the “Remote Control” section. From there, you can download or view the PDF manual specific to your remote model. The manual is designed to be user-friendly, offering step-by-step instructions for pairing, customizing buttons, and resolving common issues. Whether you’re setting up a new remote or addressing technical problems, the official manual serves as an essential resource for optimal performance.
8.2 Online Support and Community Forums
Mediacom provides extensive online support resources to help users navigate their remote control effectively. The official Mediacom website offers a dedicated support section with downloadable manuals, troubleshooting guides, and interactive tutorials. Additionally, community forums and discussion boards are available, where users can share tips, ask questions, and find solutions to common issues. These platforms often feature real-time interactions with Mediacom experts and experienced users, making them invaluable for resolving complex problems. Many users have reported success in addressing remote-related challenges through these forums, highlighting their importance as a supplementary resource to the official manual. By leveraging both official support and community-driven insights, users can ensure their Mediacom remote operates at its full potential.
In conclusion, the Mediacom Remote Control Manual serves as a comprehensive guide to unlocking the full potential of your remote. From initial setup and programming to troubleshooting and customization, this manual equips users with the knowledge needed to enhance their viewing experience. By following the steps outlined, users can ensure seamless control over their devices and explore advanced features like voice control and universal compatibility. Additionally, the availability of online resources, including the official manual and community forums, provides ongoing support for any challenges. Regular maintenance and proper care of the remote will extend its lifespan and performance. With this guide, Mediacom users can confidently navigate their entertainment systems, making the most of their remote control. Happy viewing!