

Discover the perfect bread box plans PDF to create a functional and stylish storage solution for your kitchen. Easy-to-follow guides with detailed diagrams and step-by-step instructions ensure success for all skill levels‚ helping you craft a durable and attractive bread box to keep your bread fresh and your kitchen organized.
1.1 What is a Bread Box?
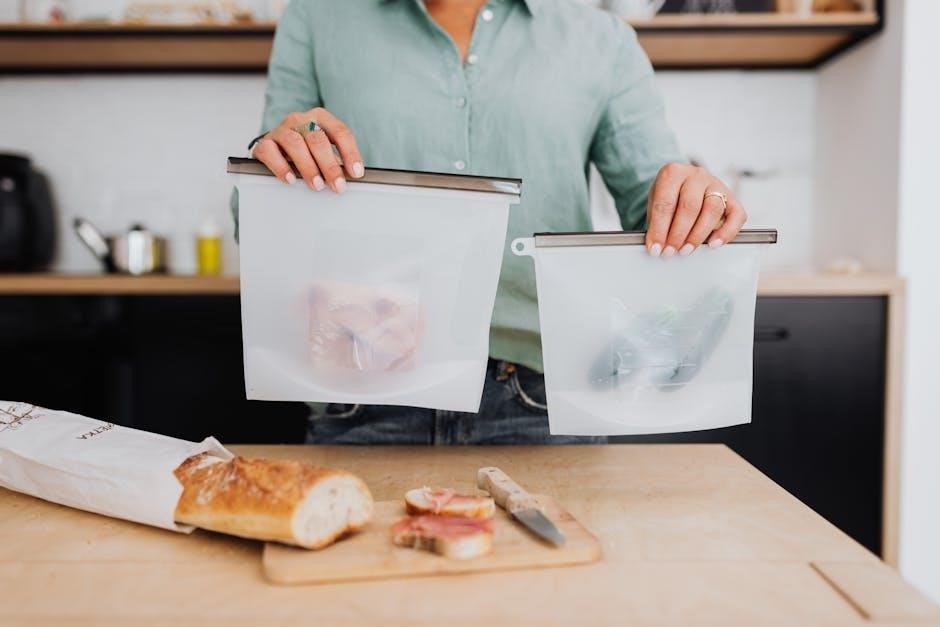
A bread box is a kitchen storage solution designed to keep bread fresh by maintaining airflow and protecting it from pests. Traditionally‚ it’s a wooden or metal container with slots for ventilation and a door for easy access. Modern designs vary‚ offering features like glass doors‚ cutting boards‚ or multiple compartments. Its purpose is to preserve bread’s freshness while adding a decorative touch to the kitchen. Whether rustic or modern‚ a bread box is a practical and stylish addition to any home.
1.2 Importance of Using a Bread Box
A bread box is essential for maintaining the freshness of bread by regulating airflow and protecting it from pests. It prevents bread from becoming stale or soggy‚ extending its shelf life. Additionally‚ it keeps countertops organized and adds a decorative touch to the kitchen. Unlike plastic bags or containers‚ a bread box allows bread to “breathe‚” preserving its natural texture and flavor. This simple yet effective storage solution is both practical and stylish‚ making it a valuable addition to any kitchen.
1.3 Benefits of Building Your Own Bread Box
Building your own bread box offers numerous benefits‚ including cost savings and customization. You can choose materials and designs that match your kitchen style‚ ensuring a perfect fit. DIY projects also provide a sense of accomplishment and allow you to add unique features like compartments or decorative elements. Additionally‚ building your own bread box can be a fun and educational woodworking project‚ suitable for all skill levels. It’s a practical way to enhance your kitchen while learning new skills.
Materials Needed for a Bread Box
Building a bread box requires high-quality wood‚ precise hardware‚ and durable finishing materials. Ensure all components are measured accurately for a sturdy and attractive design.
2.1 Types of Wood for Bread Boxes
Choosing the right wood is crucial for durability and aesthetics. Hardwoods like maple‚ oak‚ and cherry are ideal for their strength and resistance to moisture. Softwoods‚ such as pine or cedar‚ are cost-effective but may impart odors. For a rustic look‚ pallet wood or reclaimed timber works well. Ensure the wood is properly sealed to maintain freshness and prevent warping. Selecting the right type of wood ensures your bread box is both functional and visually appealing‚ complementing your kitchen decor.
2.2 Hardware and Fasteners Required

The hardware and fasteners are essential for assembling a sturdy bread box. Use high-quality hinges and latches for secure door closure. Brass or stainless steel screws are ideal for durability. Magnetic catches ensure doors stay shut‚ while drawer slides add smooth functionality. For added strength‚ consider using wood glue and clamps during assembly. Proper hardware ensures your bread box is both functional and long-lasting‚ providing reliable storage for your baked goods.
2.3 Finishing Materials for Durability
Finishing materials are crucial for protecting your bread box and ensuring durability. Use food-safe stains or paints to enhance the wood’s appearance while maintaining safety. Apply a clear sealant like polyurethane or wax to protect against moisture and spills. Natural oils‚ such as tung oil or linseed oil‚ offer an eco-friendly alternative. Always follow manufacturer instructions for application and drying times to ensure a long-lasting finish. Proper finishing ensures your bread box remains functional and attractive for years.
Tools Required for Building a Bread Box
Table saw‚ band saw‚ or jig saw for cutting wood‚ sander for smoothing surfaces‚ drill for holes‚ hammer for assembly‚ and tape measure for accurate cuts. Clamps and safety gear are essential for ensuring precision and protection during the process.
3.1 Essential Power Tools
Table saw for cutting lumber to size‚ band saw or jig saw for curved cuts‚ sander for smoothing surfaces‚ drill for making holes‚ and router for decorative edges. These tools ensure precise cuts‚ smooth finishes‚ and professional-looking joints‚ making your bread box project efficient and visually appealing. Proper use of these power tools is crucial for achieving clean‚ accurate results and maintaining safety during the construction process.
3.2 Hand Tools for Precision
Tape measure for accurate measurements‚ square to ensure alignment‚ chisel for fine-tuning joints‚ hand saw for precise cuts‚ and clamps to hold pieces in place. These tools are essential for achieving clean‚ precise results. A marking gauge helps create consistent measurements‚ while hand sanders smooth surfaces perfectly. Proper use of these hand tools ensures tight joints‚ even surfaces‚ and a professional finish‚ making them indispensable for a successful bread box project.
3.3 Safety Equipment
Safety glasses protect your eyes from debris‚ while a dust mask prevents inhaling sawdust. Hearing protection is essential when using loud power tools. A first aid kit should always be nearby for minor injuries. Wearing closed-toe shoes and keeping long hair tied back reduces accident risks. Proper work lighting ensures clear visibility‚ and steel-toe gloves provide hand protection. Prioritizing safety equipment creates a secure environment for building your bread box‚ ensuring a smooth and injury-free project completion.
Step-by-Step Guide to Building a Bread Box
Start by preparing materials‚ cutting the sides to 10″ x 7-3/16″ using a band saw. Assemble the carcass‚ then add doors and handles for functionality‚ ensuring proper alignment and fit.
4.1 Preparing the Materials
Begin by cutting the bread box sides from 3/4″ thick wood‚ measuring 10″ in length and 7-3/16″ in width. Use double-sided tape to secure the blanks together for precise cutting. Cut the radius on the front side using a band saw or jig saw‚ ensuring smooth edges. After cutting‚ separate the sides and sand them for a polished finish. Accurate measurements and proper tool use are crucial to ensure the materials fit seamlessly during assembly.
4.2 Assembling the Bread Box Carcass
Align the pre-cut sides and base‚ ensuring proper fit; Use screws to secure the sides to the base‚ forming the carcass. Check for squareness to maintain structural integrity. Attach the back panel next‚ followed by the top‚ ensuring all edges align perfectly. Use clamps to hold pieces in place while fastening. Double-check measurements and tighten all screws firmly. This step lays the foundation for a sturdy and functional bread box‚ ready for doors and finishing touches.
4.3 Adding Doors and Handles
Attach the pre-cut doors to the carcass using hinges‚ ensuring proper alignment and smooth operation; Secure the hinges with screws and test the door swing. Install handles or knobs‚ choosing designs that complement your kitchen style. Use a level to ensure doors are evenly aligned and functional. For added security‚ consider adding a latch or magnetic closure. This step completes the bread box’s accessibility features‚ making it ready for finishing touches and installation.
4.4 Finishing Touches
Sand the entire bread box to ensure a smooth surface. Apply paint‚ stain‚ or a natural finish to protect the wood and enhance its appearance. For durability‚ add a clear coat of polyurethane. Allow the finish to dry completely before use. Optionally‚ add decorative hardware or decals for a personalized touch. Ensure all surfaces are even and free of imperfections. This final step transforms your bread box into a functional and attractive kitchen accessory‚ ready to store your bread and complement your home decor.
4.5 Installing the Bread Box
Once your bread box is complete‚ install it in a convenient location‚ such as on your countertop or mounted on a wall. Ensure the surface is level and secure the box to prevent movement. Use screws or brackets for wall mounting‚ and place it near your workspace for easy access. Double-check the alignment and stability to ensure it remains sturdy. Proper installation will enhance functionality and keep your bread fresh while maintaining your kitchen’s organization and aesthetic appeal.
Design Variations for Bread Boxes
Explore diverse bread box designs‚ from rustic charm to modern aesthetics‚ artistic creations‚ and 1940s replicas. Each style offers unique features like built-in cutting boards or decorative hardware‚ ensuring functionality and visual appeal.
5.1 Rustic Bread Box Design
A rustic bread box adds charm to any kitchen with its natural‚ earthy appeal. Often crafted from pallet wood or reclaimed materials‚ these designs feature distressed finishes and decorative elements like wood burning. The rustic style emphasizes simplicity and durability‚ creating a cozy‚ vintage vibe. Some plans incorporate shelves or compartments for added functionality. This design is perfect for those who appreciate a traditional‚ homespun look that complements country or farmhouse kitchens while keeping bread fresh and organized.
5.2 Modern Bread Box Design
A modern bread box combines sleek aesthetics with functionality‚ often featuring clean lines and minimalist designs. Made from durable materials like hardwood‚ these boxes offer a contemporary look while maintaining bread freshness. Some designs include plexiglass doors for visibility and built-in cutting boards for convenience. The modern style blends seamlessly with today’s kitchens‚ providing a practical and stylish storage solution that complements any decor. These designs cater to those who value both form and function in their kitchen essentials.
5.3 Artistic Bread Box Design
An artistic bread box design offers a unique and creative way to store bread while adding a decorative element to your kitchen. These designs often feature intricate details‚ such as wood carvings‚ painted patterns‚ or mixed materials. Some plans incorporate 3D printed parts or wood burning for a personalized touch; This style allows for endless customization‚ making each bread box a one-of-a-kind piece. Perfect for those who want to blend functionality with artistic expression‚ these designs turn a simple storage solution into a kitchen statement piece.
5.4 1940s Replica Bread Box
A 1940s replica bread box captures the nostalgic charm of mid-century kitchenware. Inspired by vintage designs‚ this bread box features classic lines‚ tambour doors‚ and a sturdy build. Made from high-quality hardwood‚ it replicates the original models produced by companies like Knock On Wood Corporation. The design includes a spacious interior‚ a built-in cutting board shelf‚ and plexiglass doors for visibility. Perfect for those who appreciate retro aesthetics‚ this bread box brings a touch of history to modern kitchens while maintaining functionality and style.
5.5 Multi-Loaf Bread Box Design
The multi-loaf bread box design is perfect for families with diverse bread preferences. Featuring multiple compartments‚ it allows storage of various bread types while maintaining freshness. Plexiglass doors provide visibility‚ and a built-in cutting board adds convenience. This design is both functional and visually appealing‚ making it a practical addition to any kitchen. Its spacious interior and organized layout ensure efficient use of space‚ catering to households with multiple bread needs.

Tips for Building a Bread Box
Ensure accurate measurements and smooth sanding for a professional finish. Allow stain or paint to dry completely before assembly for durability and a polished look.
6.1 Measuring and Cutting Accurately
Accurate measuring and cutting are crucial for a professional finish. Use a band saw or jig saw for curved cuts‚ ensuring smooth edges. Double-check measurements before cutting to avoid errors. Temporarily taping sides together for radius cuts ensures consistency. Use templates for precise shapes and align cuts carefully for proper fit. Sand edges post-cutting for a polished look. Proper alignment and accurate cuts are essential for durability and functionality‚ ensuring your bread box fits together seamlessly and performs as intended.
6.2 Ensuring Proper Ventilation
Proper ventilation is essential to maintain bread freshness and prevent moisture buildup. Incorporate small holes or slats in the design to allow air circulation. Adding a slight gap between the door and frame ensures airflow without exposing the bread. Consider including adjustable vents for customizable ventilation. Screens or mesh can prevent pests while maintaining airflow. Proper ventilation extends shelf life and keeps bread dry‚ ensuring your bread box functions effectively and maintains a fresh environment for your loaves.
6.3 Adding Custom Features
Enhance your bread box with custom features to meet your needs. Add a built-in cutting board‚ knife holder‚ or adjustable shelves for versatility. Incorporate decorative elements like carved designs or painted finishes for a personalized touch. Some plans include slots for recipe cards or spice storage. Consider adding a hinged top or drawers for extra functionality. Custom features not only improve usability but also make your bread box unique‚ reflecting your style and kitchen decor while maintaining practicality.
Budget Considerations for Building a Bread Box
Building a bread box can be cost-effective by using pallet wood or leftover materials. Optional 3D printed parts add uniqueness without breaking the bank‚ making it budget-friendly.
7.1 Cost-Effective Materials
Using pallet wood or scrap materials is a budget-friendly way to build a bread box. These materials are often inexpensive or even free‚ reducing project costs significantly. Additionally‚ optional 3D printed parts can add uniqueness without breaking the bank. Many plans suggest utilizing leftover wood from previous projects‚ ensuring minimal waste and lower expenses. This approach makes building a bread box accessible and affordable for DIY enthusiasts of all skill levels.
7.2 Reducing Waste
Minimizing waste is key to a cost-effective bread box project. Use precise measurements to cut materials accurately‚ avoiding excess scraps. Consider repurposing scrap wood or pallet wood‚ which is often inexpensive or free. Some plans suggest having materials pre-cut at the store to reduce waste further. This eco-friendly approach not only saves money but also ensures your project remains sustainable and efficient‚ making it a great way to build a bread box responsibly.
7.3 DIY vs. Pre-Made Bread Boxes
Choosing between a DIY and pre-made bread box depends on your priorities. DIY offers cost savings‚ customization‚ and the satisfaction of creating something yourself. It’s a fun project for woodworking enthusiasts. Pre-made boxes‚ while more expensive‚ provide convenience and often better craftsmanship. Consider your skill level‚ time‚ and budget when deciding. DIY is ideal for those who enjoy hands-on projects‚ while pre-made suits those seeking quick‚ high-quality solutions for keeping bread fresh and organized in their kitchen.

Customization Ideas for Your Bread Box
Personalize your bread box with painting‚ staining‚ or adding decorative hardware. Incorporate storage compartments or engraved designs for a unique touch that matches your kitchen style perfectly.
8.1 Painting and Staining
Painting and staining are excellent ways to customize your bread box and match it to your kitchen decor. Use water-based paints or food-safe stains to ensure safety and durability. Sand the surface beforehand for better adhesion and a smooth finish. Choose colors that complement your kitchen theme or add a rustic touch with distressed finishes. This step not only enhances the appearance but also protects the wood‚ ensuring your bread box remains functional and attractive for years.
8.2 Adding Decorative Hardware
Add a personal touch to your bread box with decorative hardware. Choose from a variety of hinges‚ knobs‚ and handles that complement your kitchen style. Rustic brass hinges or modern chrome knobs can elevate the design. Consider adding decorative latches or intricate door pulls for a unique look. These small details enhance both functionality and aesthetics‚ making your bread box a standout piece in your kitchen while maintaining its practical purpose of keeping bread fresh and organized.
8.3 Incorporating Storage Compartments
Incorporate storage compartments to maximize functionality in your bread box. Add shelves or slots for cutting boards‚ knives‚ or spreads‚ keeping essentials within easy reach. A built-in compartment for smaller items like bags or wraps enhances organization. Multi-loaf designs with separate sections ensure each bread type stays fresh. These thoughtful additions not only improve practicality but also elevate the visual appeal of your bread box‚ making it a versatile and stylish kitchen accessory.
Building a bread box is a rewarding project that enhances kitchen organization and style. With bread box plans PDF‚ you can create a functional and attractive storage solution‚ ensuring your bread stays fresh while adding a personal touch to your kitchen. Start your project today and enjoy the satisfaction of crafting something useful and beautiful for your home!
9.1 Final Thoughts on Building a Bread Box
Building a bread box is a simple yet rewarding project that combines functionality with style. It keeps your bread fresh‚ adds charm to your kitchen‚ and offers a sense of accomplishment. With bread box plans PDF‚ you can choose from various designs‚ whether rustic‚ modern‚ or artistic‚ to match your kitchen decor. The process is straightforward‚ and the end result is a practical storage solution that enhances your kitchen’s organization and aesthetic appeal. Start your project today and enjoy the benefits of homemade bread storage!
9.2 Encouragement to Start Your Project
Starting your bread box project is an exciting venture that combines creativity with practicality. With bread box plans PDF‚ you’ll find clear guidance to bring your vision to life. Whether you’re a beginner or an experienced DIYer‚ the sense of accomplishment from building something useful for your kitchen is incredibly rewarding. Don’t hesitate—gather your tools‚ choose a design‚ and take the first step. You’ll enjoy the process and the satisfaction of storing your bread in a handmade‚ functional piece of art.
Additional Resources
Explore free PDF plans‚ video tutorials‚ and online communities for bread box projects. These resources offer detailed guides‚ tips‚ and support to help you succeed in your DIY journey.
10.1 Free PDF Plans for Bread Boxes
Download free PDF plans for bread boxes that include detailed diagrams and step-by-step instructions. These plans are perfect for DIY enthusiasts of all skill levels‚ offering customizable designs to suit your kitchen style. From rustic to modern designs‚ you’ll find plans with features like built-in cutting boards‚ plexiglass doors‚ and multi-loaf storage. Many plans also include material lists and tips for ensuring durability and proper ventilation. Whether you’re a beginner or an experienced woodworker‚ these PDF guides provide everything needed to create a functional and attractive bread box.
10.2 Video Tutorials for Beginners
Start your bread box project with confidence using video tutorials designed for beginners. These guides provide step-by-step instructions‚ covering everything from material preparation to final assembly. Many tutorials include close-ups of techniques‚ such as cutting radius edges or installing doors‚ ensuring clarity. Platforms like YouTube and DIY websites offer a variety of styles‚ from simple to artistic designs. These videos are perfect for visual learners‚ helping you overcome challenges and achieve professional-looking results. They’re a great supplement to PDF plans‚ offering hands-on guidance for success.
10.3 Online Communities for Support
Join online communities to connect with fellow DIY enthusiasts and woodworkers. Forums‚ social media groups‚ and specialized platforms offer valuable support for your bread box project. Share ideas‚ ask questions‚ and learn from experienced craftsmen. Many communities feature troubleshooting tips‚ design inspiration‚ and step-by-step advice. Popular options include Reddit’s r/woodworking‚ Facebook groups‚ and woodworking forums. These spaces provide motivation and guidance‚ helping you overcome challenges and achieve a professional finish for your bread box.
Troubleshooting Common Issues
Address common challenges like warped wood‚ misaligned doors‚ or pest infestations. Use clamps to straighten wood‚ adjust hinges for proper alignment‚ and apply sealants to prevent pests;
11.1 Fixing Warped Wood
Warped wood can be corrected by applying moisture or heat. Use clamps to hold the wood straight‚ then apply wood glue and let it dry. For severe warping‚ lightly sand the area and reattach with proper alignment. Ensure the wood is completely dry before proceeding. If the warp persists‚ consider replacing the piece. Regular inspection during the drying process can prevent further issues‚ ensuring your bread box remains sturdy and visually appealing.
11.2 Adjusting Door Alignment
Ensure doors align properly by checking hinge placement and adjusting screws. If doors are uneven‚ loosen hinge screws slightly and realign. For misaligned frames‚ plane the edges lightly. Use shims or spacers to achieve even gaps. Test closure repeatedly until smooth operation is achieved. Proper alignment prevents air leaks and maintains humidity control‚ keeping bread fresh longer. Regular checks and minor adjustments will extend the life of your bread box and ensure optimal performance.
11.3 Preventing Pest Infestation
To prevent pests‚ ensure your bread box is airtight and clean. Regularly inspect for crumbs or spills‚ as pests are attracted to moisture and odors. Seal any gaps or cracks with weatherproof sealant. Store the bread box in a dry‚ cool place away from direct sunlight. Consider adding natural deterrents like bay leaves or cinnamon inside; Always check bread for signs of pests before storing. Proper maintenance and hygiene will help keep your bread box pest-free and your bread fresh for longer.