

Proper maintenance is crucial for optimal performance and longevity of your Craftsman snowblower, as outlined in the owner’s manual, ensuring safety and efficiency. Regular upkeep covers essential tasks to extend its lifespan and reliability.
1.1 Importance of Regular Maintenance
Regular maintenance is essential to ensure your Craftsman snowblower operates safely and efficiently. It prevents mechanical failures, extends equipment lifespan, and maintains warranty validity. Proper upkeep includes checking and replacing worn parts, lubricating moving components, and ensuring all safety features function correctly. Neglecting maintenance can lead to poor performance, increased repair costs, and potential hazards during operation. Consistent care ensures reliability and optimal performance during harsh winter conditions.
1.2 Overview of the Maintenance Manual
The maintenance manual provides a comprehensive guide for Craftsman snowblower upkeep, covering safety, assembly, operation, and detailed care instructions. It includes troubleshooting tips, warranty details, and parts lists to ensure optimal performance. The manual emphasizes regular checks, lubrication, and storage practices to maintain efficiency and longevity. By following the manual, users can address common issues, prevent breakdowns, and ensure their snowblower operates safely and effectively throughout the winter season.
Safety Precautions
Always disconnect spark plugs and wear protective gear when maintaining your Craftsman snowblower. Keep children and pets away, and ensure the area is clear of obstacles. Follow all safety rules in the manual to avoid accidents and ensure safe operation.
2.1 General Safety Guidelines
Always disconnect the spark plug before performing any maintenance to ensure the snowblower cannot start accidentally. Wear protective gear, including gloves and safety glasses, to prevent injuries. Keep children and pets away from the unit. Read the manual thoroughly and follow all safety guidelines to avoid potential hazards. Ensure the work area is clear of obstacles and flammable materials. These practices help prevent accidents and ensure safe, effective maintenance.
2.2 Handling Fuel and Electrical Components
Disconnect the spark plug before handling fuel or electrical components to prevent accidental starts. Use the correct type of fuel as specified in the manual, and avoid overfilling the tank. Inspect electrical cables for damage or wear, and ensure all connections are secure. Never touch electrical parts with wet hands or while standing in water. Proper handling ensures safety and prevents potential hazards during maintenance or repairs.
2.3 Safe Storage Practices
Store your Craftsman snowblower in a dry, well-ventilated area away from flammable materials. Drain the fuel tank or use a fuel stabilizer to prevent degradation. Clean the machine thoroughly, removing dirt and debris. Apply rust protection to metal parts and lubricate moving components. Ensure the spark plug is disconnected for safety. Proper storage extends the lifespan of your snowblower and ensures it remains ready for the next winter season.
Assembly and Initial Setup
Begin by carefully unboxing and inventorying all parts. Attach handlebars and controls according to the manual. Install the chute and deflector, ensuring proper alignment. Refer to the manual for precise instructions to complete the setup efficiently and safely.
3.1 Unboxing and Inventory of Parts
Begin by carefully unboxing your Craftsman snowblower and verifying all components against the parts list in the manual. Ensure handlebars, chute, auger, and hardware are included. Cross-reference each item to avoid missing parts. Some models may include additional accessories like skid shoes or drift cutters. Organize parts neatly for easy access during assembly. Double-check for any damage or defects before proceeding.
3.2 Attaching Handlebars and Controls
Attach the handlebars by aligning the mounting brackets with the snowblower’s frame. Secure them using the provided bolts, ensuring they are tightly fastened. Next, connect the control cables to the handlebar grips, making sure they are properly seated and functional. Double-check all connections for tightness and adjust as needed. Finally, test the controls to ensure smooth operation before proceeding with further assembly.
3.3 Installing the Chute and Deflector
Attach the chute to the snowblower by aligning it with the mounting brackets on the unit. Secure it using the provided bolts, ensuring a tight fit. Next, install the deflector by sliding it onto the chute’s top edge and fastening it with screws. Adjust the deflector to your desired angle for optimal snow distribution. Finally, test the chute and deflector to ensure proper alignment and smooth operation.
Operating Instructions
Start the snowblower by following ignition procedures, adjust the chute and deflector for optimal snow distribution, and use proper techniques for varying snow conditions to ensure safety and efficiency.
4.1 Starting the Snowblower
Starting your Craftsman snowblower involves a few key steps. First, ensure the unit is on a flat surface and the choke is in the correct position. Prime the engine by pressing the primer bulb 2-3 times. Pull the starter cord firmly to engage the engine. For electric start models, turn the key or press the button. Always refer to the manual for specific starting procedures to ensure safety and proper operation.
4.2 Adjusting the Chute and Deflector
Adjusting the chute and deflector ensures proper snow distribution. Rotate the chute using the crank or handle to direct snow left or right. Use the deflector lever or knob to angle the snow flow up or down. Always wear gloves and ensure the snowblower is off before making adjustments. Proper alignment prevents clogging and optimizes performance, as detailed in the manual for precise control and efficient snow clearing.
4.3 Operating Techniques for Different Snow Conditions
Adjust your technique based on snow conditions. For light snow, maintain a steady pace and keep the chute angled slightly upward. In heavy or icy conditions, slow down and use a lower deflector setting to prevent clogging. Always wear proper gear, including gloves and goggles, for safety. Refer to the manual for specific guidance on optimizing performance in varying winter scenarios to ensure efficient and safe snow clearing.
Regular Maintenance Checks
Regular maintenance checks are essential for ensuring your Craftsman snowblower operates efficiently and lasts longer. Perform daily, weekly, and monthly inspections as outlined in the manual.
5.1 Daily Pre-Operation Checks
Before each use, inspect the snowblower to ensure safe and efficient operation. Check the fuel level, oil, and electrical connections. Verify that all moving parts, like the auger and impeller, are free from debris. Ensure the chute is clear and all controls function properly. Refer to the manual for specific daily checks to maintain performance and prevent potential issues during operation.
5.2 Weekly Lubrication of Moving Parts
Regular lubrication of moving parts is essential for smooth operation. Apply lubricant to the auger, impeller, and any pivot points weekly. Use a high-quality grease suitable for cold temperatures. Proper lubrication prevents wear and tear, ensuring optimal performance. Refer to the manual for specific locations and instructions to maintain your snowblower’s efficiency and extend its service life during the winter season.
5.3 Monthly Inspection of Cables and Belts
Inspect cables and belts monthly for wear, cracks, or fraying. Ensure the drive belt is properly aligned and tensioned, as misalignment can cause inefficiency. Lubricate pulleys and check for belt slippage. Replace any damaged or worn components to prevent breakdowns. Regular inspection ensures smooth operation and extends the lifespan of your snowblower, keeping it ready for heavy snow conditions throughout the winter season.
Engine and Fuel System Maintenance
Regular engine and fuel system maintenance is essential for optimal performance. This includes oil changes, fuel tank cleaning, and spark plug replacement, as outlined in the manual.
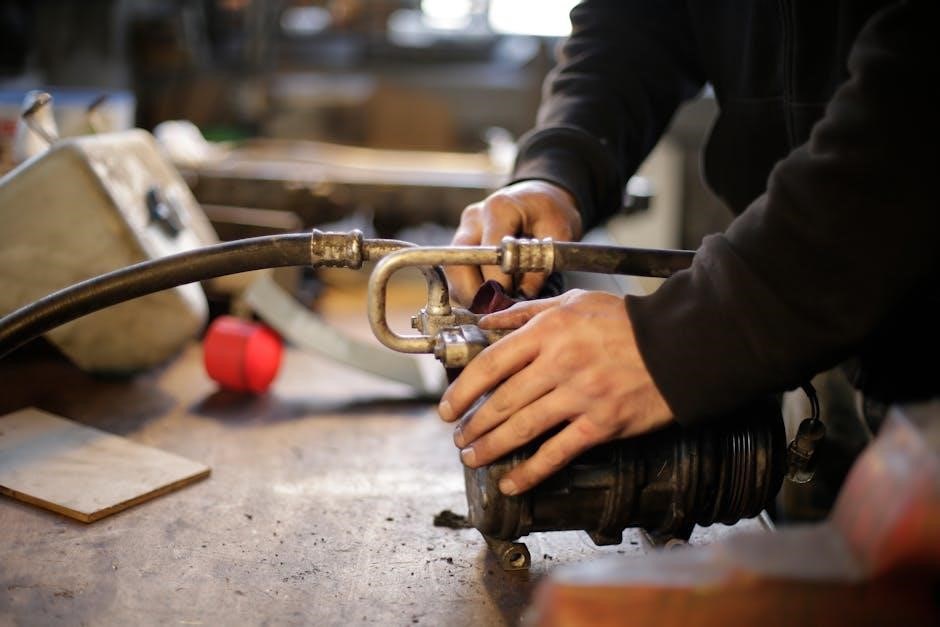
6.1 Oil Change and Filter Replacement
Regular oil changes and filter replacements are vital for maintaining your Craftsman snowblower’s engine health. Always use the oil type specified in the manual. Drain old oil into a pan, replace the filter with a new one, and dispose of used materials properly. This ensures optimal engine performance and longevity, preventing damage from contaminants and wear.
6.2 Fuel Tank Cleaning and Maintenance
Regular fuel tank cleaning and maintenance are essential to prevent corrosion and ensure proper engine performance. Drain old fuel before storage and add a fuel stabilizer to prevent degradation. Inspect the tank for rust or damage and clean it with a soft brush if necessary. Always follow the manufacturer’s guidelines for fuel type and storage to maintain your Craftsman snowblower’s efficiency and reliability during winter use.
6.3 Spark Plug Replacement
Spark plug replacement is vital for maintaining your Craftsman snowblower’s engine performance. Disconnect the spark plug wire and remove the plug using a spark plug socket. Inspect for wear or fouling and replace with a new plug of the correct type, as specified in the manual. Ensure the gap is set properly before reinstalling. This simple maintenance step helps ensure reliable starting and optimal engine operation during snowy conditions.

Auger and Impeller Maintenance
Regular cleaning of the auger and impeller ensures efficient snow removal. Inspect for damage or wear and replace blades as needed to maintain optimal performance and prevent clogs.
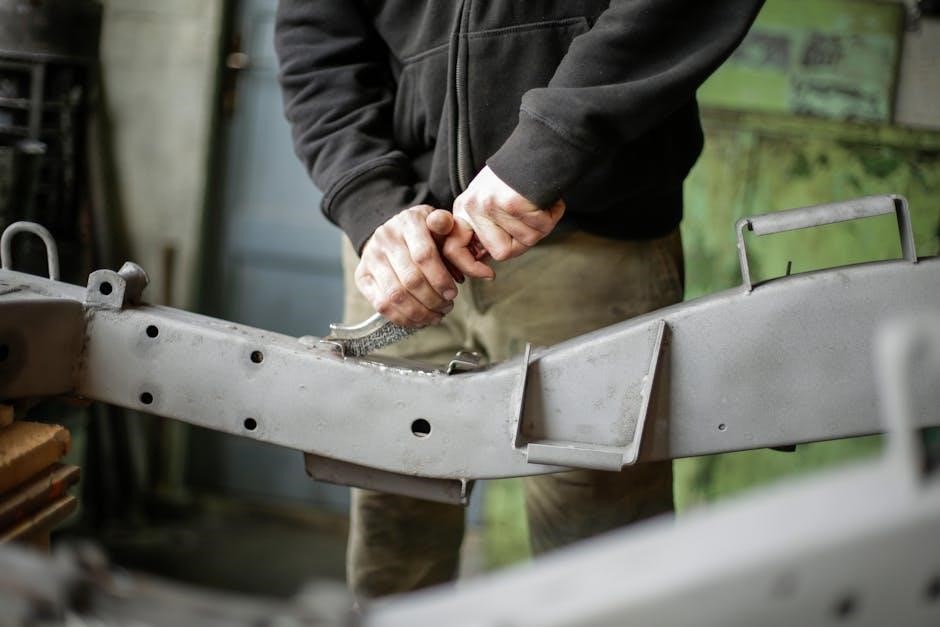
7.1 Cleaning the Auger and Impeller
Regularly clean the auger and impeller to ensure smooth operation. Disconnect the spark plug for safety. Use a wire brush to remove snow, ice, and debris. Inspect for blockages or damage. Lubricate moving parts to prevent corrosion. Proper maintenance prevents clogs and enhances performance during snow removal. Always follow the manual’s guidelines for safe and effective cleaning procedures.
7.2 Replacing Worn or Damaged Blades
Inspect the auger blades regularly for wear or damage. If damaged, replace them immediately to maintain performance. Disconnect the spark plug for safety. Remove the auger housing and take out the worn blades. Install new blades securely, ensuring proper alignment. Tighten all bolts firmly. Refer to the manual for specific torque specifications. Proper blade maintenance ensures efficient snow removal and prevents further damage to the snowblower.
7.3 Balancing the Auger for Optimal Performance
Properly balancing the auger ensures smooth operation and prevents vibrations. Disconnect the spark plug for safety. Inspect the auger for debris and damage. Clean or replace worn parts. Check the balance by spinning the auger; it should rotate evenly. If unbalanced, adjust the blades or replace them as needed. Tighten all bolts securely and test the auger for proper function. A balanced auger enhances efficiency and reduces wear on the snowblower.

Drive System Maintenance
Regularly inspect the drive belt for wear and tear. Lubricate the gearbox and axles to ensure smooth operation. Check the traction control for proper alignment and function.
8.1 Checking and Replacing the Drive Belt
Inspect the drive belt regularly for cracks, fraying, or excessive wear. Replace the belt if damaged or misaligned. Ensure proper tension to avoid slippage. When replacing, refer to the manual for the correct part number and installation steps. Clean pulleys before installing a new belt and check alignment to prevent uneven wear. Proper maintenance ensures smooth power transmission and optimal performance of your snowblower.
8.2 Lubricating the Gearbox and Axles
Regular lubrication of the gearbox and axles is essential for smooth operation and to prevent wear. Use a high-quality grease suitable for outdoor equipment. Apply grease to all moving parts, including axle bearings and gearbox connections. Lubricate every 20 hours of use or as specified in the manual. Clean old grease and debris before applying new lubricant to ensure optimal performance and extend the lifespan of your snowblower.
8.3 Adjusting the Traction Control
Adjusting the traction control ensures even power distribution to the wheels, enhancing stability and grip on slippery surfaces. Refer to the manual for specific instructions, as adjustments may vary by model. Inspect the traction cable for wear and tighten or replace it if necessary. Proper alignment and tension are crucial for optimal performance. Test the snowblower on a flat surface after adjustments to ensure smooth operation and even traction distribution.

Electrical System Maintenance
Regularly inspect fuses, spark plugs, and electrical cables for wear or damage. Ensure all connections are secure and clean to prevent malfunctions. Refer to the manual for specific procedures to maintain optimal electrical performance and safety.
9.1 Checking and Replacing Fuses
Always disconnect the spark plug before checking fuses to ensure safety. Locate the fuse box as indicated in the manual. Inspect fuses for blown conditions and replace them with the correct type and rating. Avoid using improper fuses, as this could damage the electrical system. Consult the manual for specific fuse ratings and replacement procedures to maintain your snowblower’s electrical integrity and functionality.
9.2 Inspecting and Repairing Electrical Cables
Disconnect the spark plug before inspecting electrical cables to ensure safety. Check for signs of wear, fraying, or damage. Use electrical tape for minor repairs or replace damaged cables entirely. Avoid using damaged cables, as they can cause malfunctions or safety hazards. Refer to the manual for specific instructions on cable replacement and routing to maintain proper functionality and prevent electrical issues during operation.
9.3 Maintaining the Starter Motor
Disconnect the spark plug before servicing the starter motor for safety. Clean the motor and surrounding area to prevent debris buildup. Check for worn or damaged components and replace them as needed. Ensure the primer is used correctly to avoid flooding the engine. Inspect the recoil assembly for proper tension and function. Regular maintenance ensures reliable starting and prevents costly repairs, keeping your snowblower operational during winter months.

Troubleshooting Common Issues
Identify and resolve common problems quickly to ensure optimal performance. Check spark plugs, fuel lines, and cables for issues. Consult the repair guide for detailed solutions and maintenance tips.
10.1 Snowblower Fails to Start
If your Craftsman snowblower won’t start, check the spark plug for proper grounding and look for sparks. Ensure the primer is used correctly without over-flooding the engine. Consult the repair manual for detailed troubleshooting steps. Visit Sears Parts Direct for genuine replacement parts and diagrams to resolve the issue effectively and get your snowblower running smoothly again.
10.2 Poor Snow Throwing Performance
Poor performance may result from clogged augers, dull blades, or improper chute alignment. Regularly clean the auger and impeller, and sharpen or replace worn blades. Ensure the chute and deflector are adjusted correctly for optimal snow flow. Check for blockages in the intake and discharge areas. Refer to the maintenance manual for detailed instructions to restore efficiency and ensure your snowblower operates at peak performance during winter conditions.
10.3 Unusual Noises or Vibrations
Unusual noises or vibrations may indicate issues like loose belts, worn auger blades, or debris in the chute. Inspect the auger for obstructions and tighten any loose parts. Check the drive system for misalignment or worn components. Consult the manual for diagnostic steps and repair procedures to address the problem promptly and prevent further damage to your Craftsman snowblower.

Winter Storage and Preparation
Winter storage requires thorough cleaning, fuel drainage, and rust-proofing. Store in a dry area to preserve functionality and ensure readiness for next season.
11.1 Cleaning the Snowblower Before Storage
Cleaning the snowblower before storage is essential to prevent rust and damage. Remove dirt, snow, and debris from the auger, chute, and exterior. Dry the unit thoroughly to eliminate moisture. Apply rust-inhibiting spray to metal parts and lubricate moving components. Store in a dry, protected area to maintain functionality and ensure readiness for the next winter season.
11.2 Draining Fuel and Storing the Unit
Drain the fuel tank completely or add a fuel stabilizer to prevent degradation during storage. Disconnect the spark plug for safety. Store the snowblower in a dry, secure location, away from direct sunlight and moisture. Ensure all components are clean and dry to avoid rust. Proper storage ensures the unit remains in good condition and ready for the next winter season.
11.3 Applying Rust Protection and Lubrication
Apply rust protection to metal components to prevent corrosion during storage. Use a rust-inhibiting oil or silicone-based spray on the auger, chute, and other exposed parts. Lubricate hinges, cables, and moving joints to maintain flexibility and smooth operation. Ensure the engine and all mechanical parts are well-protected to avoid damage from moisture. This step ensures your snowblower remains in excellent condition for the next winter season.
Warranty and Support Information
Craftsman snowblowers are backed by a two-year warranty covering defects in material and workmanship when maintained as per the manual. Contact Sears for repairs or support.
12.1 Understanding the Warranty Terms
The Craftsman snowblower warranty offers two years of coverage for defects in material and workmanship. Proper maintenance, as outlined in the manual, is required to uphold the warranty. Repairs are free of charge during this period when issues arise from manufacturing defects. For commercial or rental use, the warranty terms may vary. Always register your product and review the manual for specific conditions and exclusions.
12.2 Contacting Customer Support
For assistance with your Craftsman snowblower, visit the official Craftsman website or contact Sears Parts Direct. Online resources, including manuals and part diagrams, are available for troubleshooting. You can also reach customer support via phone or email for repair inquiries. Ensure to have your model number ready for efficient service. Visit Sears Parts Direct for parts and support.
12.3 Finding Authorized Service Centers
To locate an authorized service center for your Craftsman snowblower, visit the official Craftsman website or Sears Parts Direct; Use the “Service Locator” tool to find nearby authorized dealers. Additionally, RepairClinic.com offers repair resources and parts. Ensure to verify the center’s authorization to maintain warranty validity and receive genuine parts. Visit Sears Parts Direct or RepairClinic for assistance.