

The GE oven’s self-cleaning feature uses high temperatures to burn away food residue, leaving ashes that are easy to wipe away. This convenient option saves time and effort, ensuring a thorough cleaning without harsh chemicals. It’s essential to follow safety guidelines to avoid burns and ensure proper function.
1.1 Overview of the Self-Cleaning Function
The GE oven’s self-cleaning function is a convenient feature designed to simplify oven maintenance. It uses high temperatures to burn food residue, turning it into ash that’s easy to wipe away. This process eliminates the need for harsh chemicals, making it a safer and more efficient cleaning method. The oven door must be closed during the cycle to ensure proper operation and safety. Before starting, users should remove racks and large debris, as these can interfere with the cleaning process. The self-cleaning function is ideal for deep cleaning, but regular wiping of spills can help maintain the oven’s condition. Always follow the manufacturer’s guidelines to ensure optimal results and safety.
1.2 Benefits of Using the Self-Clean Cycle
Using the self-clean cycle on your GE oven offers numerous benefits, including time savings and effortless deep cleaning. The high-temperature process effectively removes tough food residue without the need for abrasive cleaners, preserving the oven’s interior. It also reduces odors and bacteria, promoting a cleaner cooking environment. Additionally, this feature extends the oven’s lifespan by preventing the buildup of grime that can damage surfaces over time. The convenience of a hands-off cleaning process allows users to focus on other tasks while the oven sanitizes itself. Regular use of the self-clean cycle ensures optimal performance and maintains the oven’s appearance, making it a valuable feature for home cooks.
Understanding the Self-Cleaning Process
The self-cleaning process uses high heat to burn food residue into ash, making cleanup easy. It requires proper preparation and safety precautions to ensure effectiveness and safety.
2.1 How the Self-Cleaning Cycle Works
The self-cleaning cycle operates by locking the oven door and heating the oven to an extremely high temperature, typically around 900°F (482°C). This intense heat converts food residue and spills into ash. The process usually takes several hours, depending on the level of soil. Once complete, the oven cools down, and the ashes can be easily wiped away with a damp cloth. It’s crucial to ensure the oven is properly prepared before starting the cycle, such as removing racks and large debris, to maximize efficiency and safety.
2.2 High-Temperature Cleaning Explained
The self-cleaning cycle uses high temperatures, often reaching up to 900°F (482°C), to incinerate food residue and spills into ash. This process is effective because the extreme heat breaks down tough, baked-on grime without the need for harsh chemicals. The oven door locks during the cycle to ensure safety and maintain consistent heat. Proper ventilation is essential, as fumes and odors may be released. The cycle typically lasts 2-4 hours, depending on soil levels. After completion, the oven cools, and the ashes can be wiped away easily. This method is efficient but requires careful preparation, such as removing racks and large debris, to ensure optimal results.
Safety Precautions for Self-Cleaning
Ensure the oven door is closed and all controls are set correctly before starting the self-cleaning cycle. Keep children and pets away, as exterior surfaces may get hot. Proper ventilation is crucial to prevent fume inhalation. Never leave the kitchen unattended during the cycle. Avoid touching hot surfaces and use oven mitts for protection. Always follow the manufacturer’s guidelines to ensure a safe and effective cleaning process.
3.1 Important Safety Tips Before Starting
Before initiating the self-cleaning cycle, ensure the oven door is closed and all controls are correctly set. Remove oven racks and accessories to prevent damage. Wipe up heavy food debris to avoid smoke and odors. Keep children and pets away, as the oven exterior may become extremely hot. Proper ventilation is essential to prevent fume buildup. Never leave the kitchen unattended during the cycle. Avoid touching hot surfaces, and use oven mitts for protection. Always follow the manufacturer’s guidelines to ensure a safe and effective cleaning process; These precautions help prevent accidents and ensure the self-cleaning feature works efficiently.
3.2 Preventing Burns and Injuries
Preventing burns and injuries is crucial when using the self-cleaning feature. Always keep children and pets away, as the oven exterior becomes extremely hot. Never touch hot surfaces, and use oven mitts when handling racks or accessories. Ensure the oven door is closed properly to avoid burns from escaping heat. Avoid leaning over the oven during the cycle, as fumes and heat can cause discomfort. Never attempt to open the door during cleaning, as it may result in burns. Keep a safe distance and monitor the process from afar. Following these guidelines helps ensure a safe and injury-free cleaning experience.
3.3 Keeping Children and Pets Away
Keeping children and pets away is essential during the self-cleaning cycle. The oven reaches extremely high temperatures, making the exterior hot enough to cause burns. Curious children may attempt to touch or open the oven door, leading to accidents. Pets, especially those unfamiliar with the noise and heat, may also be at risk. Ensure the kitchen is off-limits during cleaning by closing doors or setting up barriers. Supervise children and keep them occupied in another area. This precautionary measure ensures everyone’s safety and prevents potential injuries or distress caused by the intense heat and fumes generated during the self-cleaning process.
Preparing the Oven for Self-Cleaning
Before starting the self-cleaning cycle, remove racks and accessories, wipe heavy debris, and ensure the oven door is closed properly for safe and effective cleaning.
4.1 Removing Oven Racks and Accessories
Before initiating the self-cleaning cycle, it’s crucial to remove all oven racks, trays, and accessories. These items can warp or discolor due to extreme heat. Place them in a safe area away from the oven. This step ensures the self-cleaning process is unobstructed and prevents potential damage to your cookware. Always handle racks with oven mitts, as they may still be hot from previous use. A clean rack-free oven allows the high temperatures to effectively target tough food residue without interference. This preparation step is essential for both safety and efficiency during the cleaning cycle.
4.2 Wiping Up Heavy Food Debris
Before starting the self-cleaning cycle, remove large food particles from the oven floor. This prevents excessive smoke and residue during high-temperature cleaning. Use a damp cloth or paper towels to wipe away heavy debris, but avoid using abrasive cleaners or scrubbers, as they may damage the oven’s finish. For tough spots, let the oven cool, then scrape gently with a soft spatula. This step ensures the self-cleaning process works efficiently and prevents stubborn residue from forming. Always handle hot surfaces with oven mitts to avoid burns. A clean start guarantees better results and safer operation during the self-cleaning cycle.
4.3 Ensuring the Oven Door is Closed Properly
Properly closing the oven door is crucial for the self-cleaning cycle to function safely and effectively. Before starting, ensure the door is fully closed and latched to prevent heat from escaping. Check that all racks and accessories are removed, as they may obstruct the door’s closure. If your oven has a door lock, engage it to secure the door during the high-temperature cycle. A properly closed door helps maintain consistent heat, ensures even cleaning, and prevents dangerous fumes from leaking into the kitchen. Always verify the door’s position before starting the cycle to avoid interruptions or safety hazards during the cleaning process.
Step-by-Step Guide to Using the Self-Clean Feature
Set the oven controls correctly, select the self-clean option, and start the cycle. Ensure the door is closed and all racks are removed for safe operation.
5.1 Setting the Oven Controls Correctly
Start by ensuring the oven door is closed and all racks are removed. Use the number pads to set the desired temperature for the self-clean cycle. Touch the START pad to begin. Ensure all controls are correctly set, as the cycle won’t start otherwise. Refer to your manual for specific instructions, as settings may vary by model. Properly setting the controls ensures the self-clean feature operates safely and effectively, reaching the high temperatures needed to burn away food residue. Always double-check that the door is securely closed before starting the cycle to avoid any issues during the cleaning process.
5.2 Selecting the Self-Clean Option
Once the oven is prepared, navigate to the self-clean option using the control panel. Depending on your GE model, this may involve pressing a specific button or selecting it from the menu. Ensure the oven door is closed and all racks are removed. Some models may require you to press and hold the button for a few seconds to activate the self-clean mode. The display will confirm your selection, and the oven will begin the preheating process. Always refer to your user manual for model-specific instructions to ensure proper activation of the self-clean feature.
5.3 Starting the Self-Clean Cycle
After selecting the self-clean option, press the START button to activate the cycle. The oven will lock the door and begin heating to a high temperature, typically around 900°F, to burn away food residue. Ensure the oven door is fully closed and latched before starting. The cycle duration varies by model but usually takes 2-4 hours. During this time, the oven will emit intense heat and fumes, so proper ventilation is crucial. Keep children and pets away from the oven while it’s in operation. Once the cycle completes, the oven will turn off automatically. Allow it to cool before wiping away ashes.
5.4 Monitoring the Cleaning Process
Monitor the self-clean cycle to ensure safety and efficiency. Check that the oven door remains locked and avoid opening it during cleaning. Keep the kitchen well-ventilated to prevent fumes from accumulating. Stay nearby to address any issues, like unusual smells or sounds. Do not leave the oven unattended, especially with children or pets around. The cycle’s progress can be tracked via the oven’s display, if equipped. Once complete, let the oven cool before handling. Proper monitoring ensures a safe and effective cleaning process, preventing potential hazards and maintaining your oven’s performance. Always follow the manufacturer’s guidelines for optimal results.
Steam Cleaning as an Alternative
Steam cleaning offers a gentle, low-temperature alternative for light messes in GE ovens, providing quick results without the intense heat of the self-clean cycle.
6.1 How Steam Clean Differs from Self-Clean
Steam cleaning and self-cleaning are two distinct methods for maintaining your GE oven. The self-clean cycle uses extremely high temperatures, often reaching up to 900°F, to burn away tough food residue, leaving behind a layer of ash that can be easily wiped away. This process is ideal for heavy-duty cleaning but requires a longer duration, typically several hours, and may produce strong odors. On the other hand, steam cleaning operates at much lower temperatures and utilizes water vapor to loosen and remove light food soils; This method is quicker, usually taking about 30 minutes to an hour, and is more environmentally friendly as it doesn’t involve intense heat or harsh chemicals; Steam cleaning is perfect for routine maintenance and minor messes, while self-cleaning is better suited for deep, stubborn stains. Both methods offer unique benefits, allowing users to choose the most appropriate cleaning technique based on their specific needs and the level of cleaning required. By understanding the differences, users can optimize their oven’s performance and keep it in pristine condition with minimal effort.
6.2 Using Steam for Light Cleaning
Steam cleaning is an ideal solution for light cleaning in your GE oven. This method uses water vapor to gently loosen and remove food residue without extreme heat. To use steam cleaning, place a small amount of water in the oven bottom and set the steam clean option. The cycle typically lasts about 30 minutes, making it quicker than the self-clean feature. Steam cleaning is perfect for maintaining your oven between deep cleans and is environmentally friendly. It’s also gentler on surfaces and produces fewer odors. For light messes, steam cleaning is a convenient and efficient way to keep your oven clean and fresh without the intense heat of the self-clean cycle.
Post-Cleaning Maintenance
After the self-clean cycle, allow the oven to cool completely before wiping away ashes and residue. Clean the oven door and windows for a spotless finish.
7.1 Allowing the Oven to Cool Down
After the self-cleaning cycle, it’s crucial to let the oven cool down completely before attempting any maintenance. The oven reaches extremely high temperatures during cleaning, so waiting ensures safety. Allow at least a few hours for the oven to return to room temperature. This step prevents burns and ensures the oven is safe to handle. Cooling down also allows any remaining residue to solidify, making it easier to clean. Never attempt to wipe down the oven while it’s still hot, as this can cause serious injury. Patience is key to a safe and effective cleaning process.
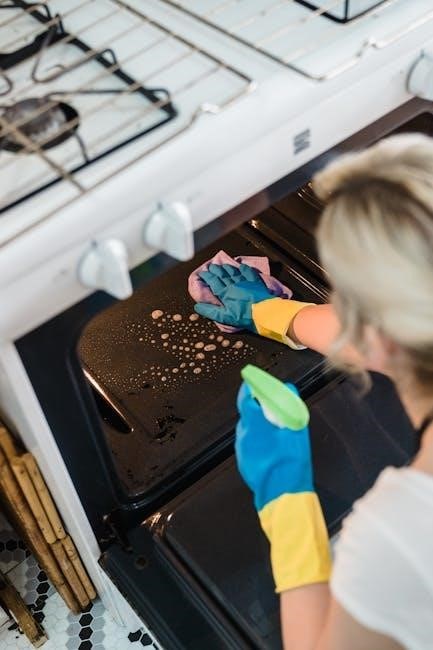
7.2 Wiping Away Ashes and Residue
Once the oven has cooled, use a damp cloth or sponge to wipe away the ashes and residue left behind by the self-cleaning cycle. This step is essential for a clean finish. Avoid using abrasive cleaners or scrubbers, as they may damage the oven’s surfaces. For tougher residue, a soft brush can help loosen particles. Wipe in a gentle, sweeping motion to remove all ash and debris. If needed, dampen the cloth again to ensure a thorough clean. Properly dispose of the residue to maintain a hygienic kitchen environment. This step completes the cleaning process, leaving your oven spotless and ready for use.
7.3 Cleaning the Oven Door and Windows
After the self-cleaning cycle, clean the oven door and windows to remove any residue or streaks. Use a damp cloth or mild detergent to wipe down the surfaces, avoiding abrasive materials that could scratch the glass. For tougher spots, a gentle glass cleaner can be applied, but ensure it’s free of ammonia to prevent damage. Dry the surfaces thoroughly with a lint-free cloth to prevent streaks. Regular cleaning of the door and windows ensures visibility during cooking and maintains the oven’s appearance. This step is crucial for both functionality and aesthetics, keeping your GE oven looking like new after each use.
Troubleshooting Common Issues
Identify and resolve issues like door misalignment or error codes to ensure smooth self-cleaning operation. Always refer to the manual for specific solutions and guidance.
8.1 Oven Door Not Closing Properly
If the oven door doesn’t close properly, the self-clean cycle won’t start. Ensure all racks and accessories are removed, as they may obstruct the door. Check for food debris or spills that might be blocking the door’s alignment. Clean the door hinges and seals to ensure a tight fit. Verify that the door is properly aligned with the frame and that no obstructions are present. If issues persist, consult the GE oven manual for troubleshooting steps or contact a professional for assistance. Proper door closure is essential for safety and effective cleaning during the self-clean cycle.
8.2 Self-Clean Cycle Not Starting
If the self-clean cycle fails to start, ensure the oven door is fully closed and latched. Check that all controls are set correctly, as indicated in the GE manual. Verify that the oven is preheated and in the correct mode. Ensure no cookware or racks are obstructing the door or sensors. If issues persist, reset the oven by turning it off and unplugging it for 30 seconds before retrying. Consult the troubleshooting section of the manual for additional guidance or contact GE support if the problem continues. Proper setup and preconditions are crucial for initiating the self-clean cycle effectively.
8.3 Strange Odors During Cleaning
Strange odors during the self-clean cycle are common due to food residue burning at high temperatures. Ensure proper ventilation by opening windows or using an exhaust fan to reduce fumes. Check for large debris, as burning food particles can create unpleasant smells. If the odor persists, wipe up heavy soil before starting the cycle. Avoid using abrasive cleaners, as they can leave residues that burn and cause odors. For lighter smells, a small amount of water on the oven floor can help reduce fumes. Always follow the GE manual’s guidelines for a smoother cleaning process and to minimize unwanted odors.
Energy Efficiency and Self-Cleaning
The GE oven’s self-cleaning feature uses high temperatures to efficiently burn food residue, balancing energy consumption with effective cleaning. Proper ventilation helps manage energy use during cycles.
9.1 Energy Consumption During Self-Clean
The GE oven’s self-cleaning cycle operates at high temperatures, which increases energy consumption during the process. The oven reaches extreme heat to burn away food residue efficiently. While this method is effective, it uses significantly more energy than standard cooking cycles. However, the cycle is designed to minimize the duration of high energy use by completing the cleaning process within a few hours. Proper ventilation is recommended to ensure safety and maintain energy efficiency. Users should also consider the frequency of self-cleaning to balance energy usage with maintenance needs. Always refer to the manual for specific energy consumption details.
9.2 Balancing Cleaning and Energy Use
Balancing effective cleaning with energy efficiency is key when using the GE oven’s self-cleaning feature. While the high-temperature cycle consumes more energy, it ensures a thorough cleaning. To optimize energy use, run the cycle during off-peak hours and avoid frequent cleanings. Additionally, removing large debris beforehand reduces the need for prolonged high heat. Proper maintenance, like wiping up spills promptly, can also minimize the frequency of deep cleans. By following these practices, users can maintain their oven’s cleanliness while managing energy consumption responsibly. Always consult the manual for specific guidelines tailored to your model.
Environmental Considerations
The self-cleaning cycle releases fumes, so proper ventilation is crucial. Open windows and use exhaust fans to minimize odor impact. Ensure residue disposal follows local guidelines;
10.1 Fumes and Ventilation
The self-cleaning cycle produces strong fumes due to burning food residue. Proper ventilation is essential to prevent odor buildup and potential health concerns. Open windows and doors to allow fresh air circulation. Using an exhaust fan can help remove fumes more efficiently. Ensure the kitchen is well-ventilated throughout the cleaning process to minimize exposure to harmful vapors. Avoid inhaling the fumes directly, as they may cause respiratory discomfort. Proper ventilation not only improves air quality but also enhances safety during the self-cleaning process. Always prioritize airflow to maintain a safe and comfortable environment while using this feature.
10.2 Disposal of Cleaning Residue
After the self-cleaning cycle, allow the oven to cool completely before handling any residue. Use a soft brush or damp cloth to collect the ash and food particles. Dispose of the residue in a sealed container or trash bag to prevent dust from spreading. Avoid pouring ash or debris down drains, as it may cause clogs. For eco-friendly disposal, check local regulations regarding household waste. Properly discarding cleaning residue ensures a clean and safe kitchen environment. Always wear gloves when handling ash to protect your skin from potential irritation. This step completes the self-cleaning process effectively and responsibly.
The GE oven’s self-cleaning feature simplifies maintenance by using high heat to burn food residue, leaving ashes for easy cleanup. Always follow safety guidelines and proper disposal methods for optimal results.
11.1 Summary of Key Points
The GE oven’s self-cleaning feature offers a convenient way to maintain your appliance by using high temperatures to burn away food residue, leaving behind ashes for easy removal. Safety is paramount, with guidelines emphasizing the importance of a closed oven door, proper ventilation, and keeping children and pets away during the cycle. Preparation steps, such as removing racks and wiping up heavy debris, ensure the process is effective. Energy efficiency is balanced with thorough cleaning, and environmental considerations, like proper residue disposal, are highlighted. By following the manual’s instructions, users can enjoy a clean oven with minimal effort while adhering to safety and maintenance best practices.
11.2 Final Tips for Effective Self-Cleaning
For optimal results, always allow the oven to cool completely before wiping away ashes. Regularly cleaning up heavy food debris beforehand ensures the cycle works efficiently. Keep the oven door closed during the process to maintain high temperatures. Proper ventilation is crucial to prevent fumes from lingering. After cleaning, wipe the door and windows for clarity. For lighter messes, consider using the steam clean option. Remember to dispose of cleaning residue responsibly. By following these tips and adhering to safety guidelines, you can maintain your GE oven’s performance and keep it in excellent condition for years to come.