
The Honeywell T6 Pro Wi-Fi Thermostat is a programmable, smart home device designed for efficient temperature control and seamless integration with modern HVAC systems.
1.1 Overview of the Honeywell T6 Pro Wi-Fi Thermostat
The Honeywell T6 Pro Wi-Fi Thermostat is a programmable, smart home device designed for efficient temperature control and seamless integration with modern HVAC systems. It features geofencing, smart home compatibility, and energy-saving modes. The thermostat is part of the Lyric series, offering advanced functionality for professional installation. Its intuitive interface and Wi-Fi connectivity enable remote monitoring and adjustments, making it a versatile solution for both residential and light commercial applications.
1.2 Importance of Proper Installation
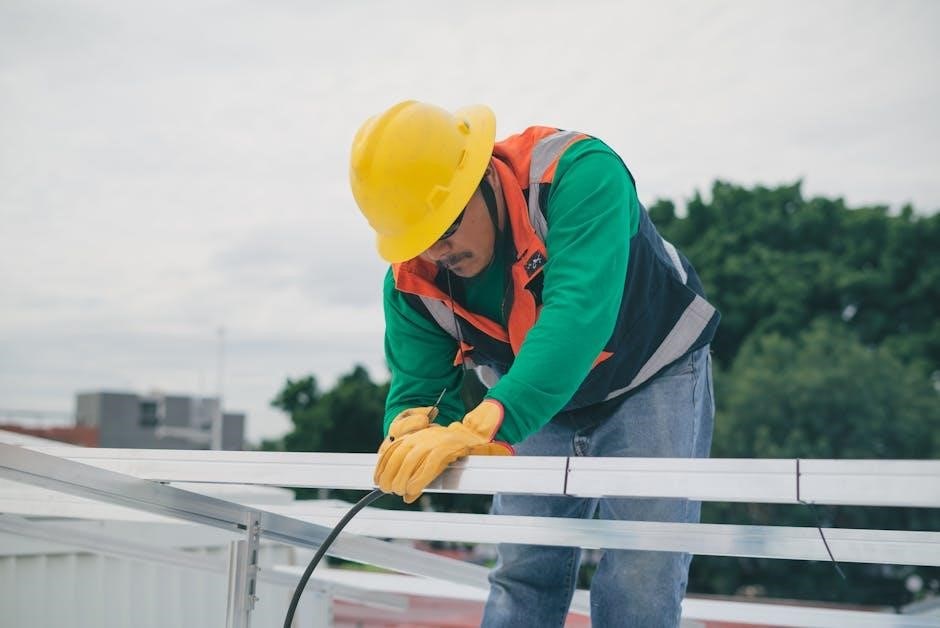
Proper installation of the Honeywell T6 Pro Wi-Fi Thermostat is crucial for ensuring optimal performance, safety, and efficiency. Incorrect wiring or setup can lead to system malfunctions, safety hazards, or reduced energy efficiency. Following the installation manual carefully ensures compatibility with your HVAC system, proper Wi-Fi connectivity, and full access to smart features like geofencing and remote monitoring. Correct installation also prevents potential damage to the thermostat or connected systems.

Package Contents and Accessories
The Honeywell T6 Pro Wi-Fi Thermostat package includes the thermostat unit, UWP mounting system, J-box adapter, and decorative cover for a complete installation setup.
2.1 Items Included in the Package
The Honeywell T6 Pro Wi-Fi Thermostat package includes the thermostat unit, UWP mounting system, J-box adapter, and decorative cover. These components ensure a complete and professional installation, providing everything needed for setup and compatibility with various HVAC systems. The UWP mounting system offers flexibility, while the decorative cover enhances the thermostat’s appearance. All items are designed for seamless integration and functionality.
2.2 Optional Accessories and Adapters
Optional accessories for the Honeywell T6 Pro Wi-Fi Thermostat include additional wall plates, wiring adapters, and sensors for enhanced functionality. These items can be purchased separately to customize the installation based on specific HVAC system requirements or aesthetic preferences. They ensure compatibility and improve the overall performance of the thermostat in various home environments.
System Requirements for Installation
The Honeywell T6 Pro Wi-Fi Thermostat requires a compatible HVAC system, stable Wi-Fi network, and proper wiring connections for optimal performance and smart home integration.
3.1 Compatibility with HVAC Systems
The Honeywell T6 Pro Wi-Fi Thermostat is compatible with most standard HVAC systems, including forced air, heat pumps, and dual-fuel systems. It supports conventional 24V systems and select millivolt applications. The thermostat works seamlessly with single-stage, two-stage, and multi-stage heating and cooling systems. Proper compatibility ensures efficient performance and precise temperature control. Always verify system specifications before installation to guarantee optimal functionality.
3;2 Wi-Fi Network Requirements
The Honeywell T6 Pro Wi-Fi Thermostat requires a 2.4 GHz Wi-Fi network for connectivity. It supports WEP, WPA, and WPA2 security protocols. Ensure your router is configured correctly and the network is stable. The thermostat does not support 5 GHz networks. A strong internet connection is essential for smart features and remote access via the Honeywell Home app. Verify network compatibility before installation for seamless setup.
UWP Mounting System Installation
The UWP Mounting System simplifies installation by providing a universal wall plate. Open the package, position the UWP, and ensure proper alignment. Use the included adapter and decorative cover for a clean finish.
4.1 Step-by-Step Mounting Instructions
- Open the package and identify the UWP Mounting System components, including the wall plate, adapter, and decorative cover.
- Prepare the wall by turning off power to the HVAC system and removing the old thermostat.
- Attach the UWP wall plate to the wall, ensuring proper alignment with the wiring holes.
- Align the Honeywell T6 Pro thermostat with the UWP and secure it firmly.
- Restore power and test the thermostat to ensure proper functionality.
Follow these steps for a seamless installation.
4.2 Adjusting the Slider Tabs for Proper Fit
- Gently pull the slider tabs on the UWP Mounting System to adjust the width.
- Ensure the tabs fit snugly around the thermostat for a secure installation.
- For systems with specific requirements, such as ventilation, adjust the tabs to accommodate any additional components.
- Release the tabs once the thermostat is properly aligned and fitted to the wall plate.
Proper adjustment ensures a seamless and secure installation.
4.3 Considerations for Ventilation Systems
When installing the Honeywell T6 Pro Wi-Fi Thermostat, ensure proper ventilation system compatibility. Check if your HVAC system requires specific airflow settings or venting configurations. Adjust the slider tabs to accommodate any ventilation-related components. Ensure the thermostat’s mounting does not obstruct airflow or interfere with system operation. Proper alignment and fit are crucial for optimal performance and energy efficiency.
Installer Setup Using the Thermostat
The Honeywell T6 Pro Wi-Fi Thermostat offers an Installer Setup Menu for configuring advanced settings. Access the menu via the thermostat’s interface to adjust system parameters, enabling optimal performance and compatibility with your HVAC system. Use the Resideo app for remote monitoring and adjustments, ensuring a seamless setup process tailored to your installation needs.
5.1 Navigating the Installer Setup Menu
Navigate the Installer Setup Menu by accessing it through the thermostat’s interface. Use the touchscreen to scroll through options and configure advanced settings. The menu allows you to adjust system parameters, enable features, and ensure compatibility with your HVAC system. Follow on-screen prompts to complete the setup process efficiently, ensuring optimal performance and integration with smart home systems.
5.2 Configuring Advanced Settings
Configure advanced settings by accessing the Installer Setup Menu. Adjust temperature limits, fan controls, and geofencing parameters. Enable smart recovery and energy-saving modes. Use the Honeywell Home app to fine-tune settings remotely. Ensure compatibility with your HVAC system by selecting the correct equipment type and configuring wiring terminals. These settings optimize performance and integrate seamlessly with smart home systems for enhanced efficiency and control.
Key Features of the Honeywell T6 Pro Wi-Fi
The Honeywell T6 Pro Wi-Fi Thermostat features geofencing, smart home integration, and energy-saving modes. Its intuitive touchscreen and remote app control optimize comfort and reduce energy consumption effectively.
6.1 Geofencing and Smart Home Integration
The Honeywell T6 Pro Wi-Fi Thermostat supports geofencing, automatically adjusting temperatures based on your location. It integrates seamlessly with smart home systems like Amazon Alexa and Google Home, enabling voice control and enhanced convenience. Through the Honeywell Home app, users can set up custom geofencing zones and routines, optimizing energy usage and ensuring a comfortable home environment upon arrival.
6.2 Energy-Saving Features and Alerts
The Honeywell T6 Pro Wi-Fi Thermostat offers advanced energy-saving features, including smart alerts for high energy usage and customizable energy reports. It detects potential issues and provides tips to optimize efficiency. Alerts notify users of unusual temperature swings or system malfunctions, ensuring timely adjustments to reduce energy waste and maintain optimal performance.
Connecting the Thermostat to Wi-Fi
Connect your Honeywell T6 Pro Wi-Fi Thermostat to your home network using the Honeywell Home app. Download the app, log in, select your thermostat, and follow in-app prompts to complete the Wi-Fi setup for smart control and remote monitoring.
7.1 Initial Wi-Fi Setup and Connection
Start by opening the Resideo App and logging in to your account. Select your Honeywell T6 Pro Thermostat from the list of devices. Tap the settings icon, then scroll to the Wi-Fi section. Choose your home network from the available options and enter your password. Follow the app prompts to complete the connection. Ensure your thermostat is in Wi-Fi setup mode for a successful link.
7.2 Troubleshooting Wi-Fi Connectivity Issues
If your Honeywell T6 Pro Thermostat fails to connect to Wi-Fi, reset the connection by opening the Resideo App, selecting your thermostat, and navigating to settings. Tap “Reset WiFi” and follow prompts to reconnect. Ensure your network name and password are correct. Power cycle the thermostat and router if issues persist. Verify your network is functioning properly before retrying the connection process.
Advanced Settings and Customization
Program a 7-day schedule, adjust temperature setpoints, and customize deadbands for optimal energy efficiency. These settings ensure your system operates smoothly and meets your comfort needs precisely.
8.1 Programming a 7-Day Schedule
Program a 7-day schedule by accessing the menu, selecting “Schedule,” and choosing the desired days. Set temperature preferences for each day, with options for multiple periods. Use the Honeywell Home app for remote adjustments. This feature ensures energy efficiency and comfort by automating temperature changes according to your routine. Customizable settings allow for precise control, optimizing your HVAC system’s performance and energy usage throughout the week.
8.2 Adjusting Temperature Setpoints and Deadbands
Adjust temperature setpoints and deadbands via the thermostat or Honeywell Home app. Setpoints define desired temperatures, while deadbands determine the range around them. Narrow deadbands increase system activity, optimizing comfort and energy use. Adjustments are made in the settings menu, allowing customization to suit your preferences. Note that Honeywell’s algorithm fixes the deadband at 0°F, ensuring consistent performance and efficiency in heating and cooling cycles.

Wiring and Terminal Designations
The Honeywell T6 Pro Wi-Fi Thermostat requires proper wiring connections, with terminals labeled for specific functions (e.g., R, W, Y, G, C, O/B). Ensure correct wiring for optimal performance.
9.1 Understanding Terminal Labels and Connections
The Honeywell T6 Pro Wi-Fi Thermostat features labeled terminals (R, W, Y, G, C, O/B, etc.) for specific functions. R provides 24V power, W controls heating, Y handles cooling, G operates the fan, and C is the common wire. O/B is used for heat pump reversal. Proper wiring ensures system functionality. Always refer to the manual for precise connections to avoid installation issues and ensure safe operation.
9.2 Wiring Requirements for Proper Functionality
Proper wiring is essential for the Honeywell T6 Pro Wi-Fi Thermostat to function correctly. Ensure all connections are secure and match the terminal labels. A 24V AC power supply is required, and a common wire (C) is necessary for Wi-Fi operation. Use 18 AWG or larger wires, and verify compatibility with your HVAC system. Incorrect wiring can damage the thermostat or pose safety risks.
Using the U Slider Tab
The U Slider Tab is part of the UWP Mounting System, ensuring proper alignment and fit during installation. It helps secure the thermostat to the wall.
10.1 Functionality of the U Slider Tab
The U Slider Tab is a key component of the UWP Mounting System, designed to ensure secure and precise installation of the Honeywell T6 Pro Wi-Fi Thermostat. It allows for easy alignment and adjustment, providing a snug fit on various wall types. This feature minimizes installation time and ensures the thermostat is properly mounted for optimal functionality and appearance.
10.2 Adjusting the U Slider Tab for System Compatibility
Adjusting the U Slider Tab ensures compatibility with various HVAC systems and wall types. The slider allows for precise alignment and secure mounting, accommodating different system configurations. Proper adjustment prevents issues like loose installation or misalignment, ensuring reliable performance and seamless integration with your home’s heating and cooling setup.
Resetting the Wi-Fi Connection
Resetting the Wi-Fi connection on the Honeywell T6 Pro thermostat involves opening the Resideo App, selecting the thermostat, and navigating to settings to reset and reconnect.
11.1 Steps to Reset Wi-Fi on the Thermostat
To reset the Wi-Fi connection on the Honeywell T6 Pro thermostat, open the Resideo App, log in, and select your thermostat. Tap the settings icon, scroll down, and choose “Reset WiFi.” Follow the app prompts to reconnect to your existing network or set up a new connection. This process ensures your thermostat reconnects properly to your Wi-Fi network for smart functionality.
11.2 Reconnecting to a New Wi-Fi Network
After resetting the Wi-Fi, open the Resideo App, select your thermostat, and navigate to settings. Choose “Reset WiFi” and follow prompts to connect to a new network. Enter your network password when prompted. The thermostat will reconnect, ensuring smart features like remote control and scheduling function properly. Confirm connection status in the app to complete the process successfully.
Factory Resetting the Thermostat
A factory reset restores the Honeywell T6 Pro Wi-Fi Thermostat to its default settings, resolving persistent issues. Perform this when the thermostat malfunctions or before transferring ownership. Use the Resideo App or thermostat menu to initiate the reset, ensuring all custom settings and schedules are cleared for a fresh start.
12.1 When to Perform a Factory Reset
A factory reset is necessary when experiencing persistent issues that troubleshooting cannot resolve. It is also recommended before transferring ownership or when starting fresh with default settings. This process erases all custom schedules, preferences, and Wi-Fi configurations, restoring the thermostat to its original state. Perform a factory reset via the Resideo App or thermostat menu when these scenarios arise.
12.2 Steps to Factory Reset the Honeywell T6 Pro
To factory reset the Honeywell T6 Pro, open the Resideo App, select the thermostat, and navigate to the settings menu. Scroll down and choose “Factory Reset.” Follow the on-screen instructions to complete the process. Alternatively, use the thermostat’s menu: go to “Settings,” select “Factory Reset,” and confirm. This restores default settings, erasing all custom configurations and Wi-Fi connections, ensuring a clean start for the device.
Mobile App Setup and Registration
Download the Honeywell Home app, create an account, and register your T6 Pro thermostat. Follow in-app instructions to connect the device and enable remote monitoring.
13.1 Downloading and Installing the Honeywell Home App
Visit the App Store (for iOS) or Google Play Store (for Android) and search for the Honeywell Home app. Download and install the app on your device. Once installed, open the app to begin the setup process for your T6 Pro thermostat. This app is essential for remote control, scheduling, and monitoring your thermostat’s performance.
13.2 Registering the Thermostat in the App
Open the Honeywell Home app and log in to your account. Select the option to add a new device and choose the T6 Pro thermostat. Follow the in-app prompts to register your thermostat by entering the unique identifier found on the device or its packaging. This step links your thermostat to your account, enabling remote control and monitoring through the app.
13.3 Remote Control and Monitoring via the App
Using the Honeywell Home app, users can remotely adjust temperature settings, monitor current conditions, and receive system alerts. The app allows scheduling adjustments and energy usage tracking. Remote access ensures convenience and energy efficiency, enabling users to manage their HVAC system from anywhere with a secure internet connection.

Energy-Saving Tips and Tricks
- Adjust temperature setpoints to optimize energy usage.
- Use the app to monitor and control settings remotely.
- Enable geofencing for automatic adjustments based on location.
- Program a 7-day schedule to reduce unnecessary heating/cooling.
14.1 Optimizing Your Thermostat Settings for Energy Efficiency
Optimize energy efficiency by adjusting temperature setpoints, enabling geofencing, and programming a 7-day schedule. Use the Honeywell Home app to monitor and control settings remotely, reducing unnecessary heating or cooling. Lower temperatures when away and raise them when returning. Smart features like automatic adjustments based on location can significantly cut energy consumption and lower utility bills.
14.2 Using Smart Features to Reduce Energy Consumption
Leverage smart features like geofencing, smart alerts, and energy usage reports to minimize energy waste. Geofencing adjusts temperatures based on your location, while smart alerts notify you of prolonged system operation. Energy reports provide insights into consumption patterns, helping you identify inefficiencies. These features work together to optimize your HVAC system’s performance and reduce overall energy usage effectively.
Maintenance and Troubleshooting
Regularly clean the thermostat and check for software updates. Troubleshoot common issues like display malfunctions or connectivity problems by resetting the device or checking wiring connections.
15.1 Regular Maintenance Tasks for the Thermostat
Regular maintenance ensures optimal performance. Clean the thermostat display and sensors with a soft cloth. Check for firmware updates in the Honeywell Home app. Inspect wiring connections for damage or corrosion. Ensure the UWP mounting system is secure and level. Replace batteries if applicable. Check the app for maintenance notifications and follow recommended actions to keep the system running smoothly and efficiently year-round.
15.2 Common Issues and Their Solutions
Common issues include Wi-Fi disconnections, display malfunctions, and sensor inaccuracies. For Wi-Fi issues, reset the thermostat and reconnect via the app. If the display is unresponsive, restart the device. Clean sensors with a soft cloth to ensure accuracy. Check wiring connections for looseness or damage. Refer to the Honeywell Home app for troubleshooting guides or contact support for persistent problems.
The Honeywell T6 Pro Wi-Fi Thermostat offers advanced smart home integration and energy-saving features. Proper installation ensures optimal performance. Regular updates and maintenance are recommended for best results.
16.1 Summary of Key Installation Steps
Begin by unpacking the Honeywell T6 Pro Wi-Fi Thermostat and UWP Mounting System. Ensure compatibility with your HVAC system and Wi-Fi network. Mount the thermostat using the UWP system, adjusting slider tabs for a secure fit. Connect the wiring according to terminal designations and complete the installer setup. Finally, register the thermostat in the Honeywell Home app and connect to your Wi-Fi network for remote monitoring and control.
16.2 Final Tips for Optimal Performance
Regularly update the thermostat software and maintain a stable Wi-Fi connection. Use geofencing and smart home integration for energy efficiency. Adjust temperature setpoints and deadbands for optimal comfort. Schedule routine maintenance and clean the thermostat to ensure accuracy. Monitor energy usage through the app and adjust settings to minimize consumption. Properly configure ventilation systems and slider tabs for consistent performance.