

Manual vending machines offer a fun and educational DIY project, combining creativity with functionality․ They provide a hands-on approach to understanding automation and mechanics, making them perfect for enthusiasts and learners alike․
What is a Manual Vending Machine?
A manual vending machine is a DIY device designed to dispense items like snacks, toys, or other small products․ Unlike automated versions, it relies on mechanical or semi-automatic mechanisms to operate․ These machines are often built using materials like MDF, cardboard, or 3D-printed parts, making them accessible for hobbyists and creators․ They typically involve a dispensing system, such as coils or spirals, to release products when selected․ Manual vending machines are popular in educational and DIY projects, teaching concepts of engineering, programming, and automation․ They also serve as fun and functional creations, offering a sense of accomplishment for builders․ While simpler than commercial machines, they provide a hands-on experience in designing and constructing a working vending system․
Benefits of Building a Manual Vending Machine
Building a manual vending machine offers numerous benefits, including hands-on learning of engineering and automation principles․ It fosters creativity and problem-solving skills, making it an excellent DIY project for hobbyists and students․ The process teaches essential skills like prototyping, mechanical design, and troubleshooting․ Additionally, it provides a sense of accomplishment and pride in creating a functional device․ Manual vending machines are also cost-effective, as they often use readily available materials like MDF or cardboard․ They serve as a great introduction to programming and electronics, especially when integrated with microcontrollers like Arduino․ Moreover, these machines can be customized to suit various needs, making them versatile for personal or small-scale commercial use․ Overall, building a manual vending machine is both educational and rewarding, offering a unique blend of fun and functionality․
Overview of DIY Vending Machine Projects
DIY vending machine projects range from simple, handmade models to complex, automated systems․ These projects often involve creative materials like MDF, cardboard, or 3D-printed parts, combined with basic tools and electronics․ Many builders use Arduino microcontrollers to add functionality, such as dispensing mechanisms and payment systems․ The internet offers numerous guides and inspiration, showcasing machines that dispense snacks, toys, or even handmade items․ These projects are not only fun but also educational, teaching essential skills in engineering, programming, and problem-solving․ They encourage innovation and customization, allowing creators to tailor their machines to specific needs․ Whether for personal use, gifts, or small businesses, DIY vending machines offer a rewarding and interactive way to combine creativity with practicality․

History and Evolution of Vending Machines
Vending machines trace their origins to ancient civilizations, with early versions dispensing holy water․ Modern machines emerged in the 19th century, evolving from simple coin-operated devices to sophisticated, automated systems․
Early Concepts of Vending Machines
The earliest known vending machine was invented by Hero of Alexandria in the 1st century AD, dispensing holy water in temples․ This mechanical device used a lever and valve system․ In the 17th century, rudimentary machines appeared in England, offering tobacco․ These early concepts relied on simple mechanisms, laying the groundwork for modern automation․ The idea of dispensing goods automatically fascinated inventors, leading to gradual improvements․ By the 19th century, coin-operated machines became common, paving the way for the vending industry․ These early innovations emphasized mechanical simplicity, focusing on basic dispensing systems․ They inspired later advancements, including manual and DIY approaches, showcasing human ingenuity in creating convenient solutions․
Modern Advancements in Vending Technology
Modern vending technology has evolved significantly, integrating automation and smart systems․ Microcontrollers like Arduino enable precise control over dispensing mechanisms, while sensors detect inventory levels and user interactions․ Automation enhances efficiency, reducing manual intervention․ DIY projects now incorporate advanced features such as cashless payments and app integration․ These innovations make vending machines more interactive and user-friendly․ Customization options allow creators to tailor machines for specific products or themes․ The fusion of electronics and mechanics has transformed vending machines into versatile tools for both convenience and creativity․ These advancements inspire builders to push boundaries, creating machines that are not only functional but also innovative․ Modern technology has redefined the possibilities for manual vending machines, making them smarter and more adaptable than ever before․
The Rise of DIY and Custom Vending Machines
The rise of DIY and custom vending machines has been fueled by the growing popularity of DIY culture and the accessibility of tools like Arduino and 3D printing․ Enthusiasts are now creating personalized vending machines tailored to specific needs, such as dispensing niche products or fitting unique spaces․ Online communities and tutorials have made it easier for individuals to share ideas and learn from one another․ Custom vending machines often feature innovative mechanisms, such as spiral dispensers or sensor-activated systems, showcasing creativity and problem-solving skills․ This trend not only promotes self-sufficiency but also encourages experimentation and innovation in vending technology․ As a result, DIY vending machines have become a vibrant niche in the maker community, blending practicality with creativity․

Materials and Components for a Manual Vending Machine
Manual vending machines use materials like MDF, cardboard, and aluminum wire; Components include Arduino, servos, springs, and sensors for automation and dispensing mechanisms․
Structural Materials (MDF, Cardboard, etc․)
Structural materials like MDF and cardboard are essential for building a manual vending machine․ MDF is durable and easy to cut, making it ideal for the machine’s frame and compartments․ Cardboard, while less sturdy, is lightweight and cost-effective, often used for prototypes or decorative elements․ These materials are versatile and readily available, allowing creators to experiment with different designs without significant financial investment․ Proper cutting and assembly ensure stability, while finishes like paint or stickers can enhance aesthetics․ The choice of material depends on the project’s scale and intended use, with MDF offering longevity and cardboard providing simplicity․ Both options cater to DIY enthusiasts, making manual vending machines accessible and fun to construct․
Mechanical Components (Servos, Springs, etc․)
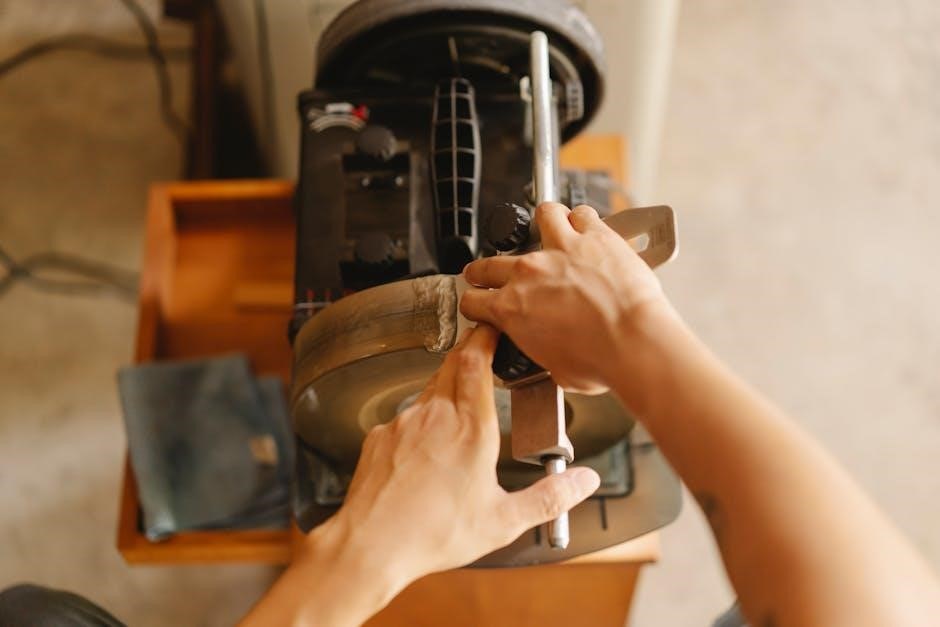
Mechanical components such as servos and springs are crucial for the operation of a manual vending machine․ Servos, particularly continuous rotation servos, are often used to power dispensing mechanisms, ensuring items are released smoothly․ Springs play a key role in pushing products forward, maintaining tension in the coils or spirals that hold the items․ These components work together to create a reliable dispensing system․ For example, manually bent aluminum wires or coils can be shaped around PVC pipes to form spirals, which, when activated by servos, release the selected product․ The combination of these mechanical parts ensures efficient and consistent item dispensing, making them essential for the functionality of a DIY vending machine․
Electronic Components (Arduino, Sensors, etc․)
Electronic components like Arduino microcontrollers and sensors are vital for automating a manual vending machine․ Arduino serves as the brain, controlling the machine’s operations, such as dispensing items and managing user inputs․ Sensors, including infrared and optical sensors, detect product levels, monitor selection processes, and ensure smooth transactions․ These components enable automation, allowing the machine to function interactively․ For instance, sensors can detect when an item is dispensed or if a slot is empty, while Arduino processes this data to execute commands․ By integrating these electronic parts, the vending machine gains intelligent functionality, making it user-friendly and efficient․ This setup also allows for customization, such as adding lights or coin counters, enhancing the machine’s capabilities and user experience․

Mechanism of a Manual Vending Machine
A manual vending machine operates through a dispensing mechanism, payment system, and sensors, ensuring products are released upon selection and payment, providing a smooth user experience․
Dispensing Mechanism (Coils, Spirals, etc․)
The dispensing mechanism in a manual vending machine relies on coils or spirals to release products․ These components are typically made from materials like aluminum wire, bent into shape using tools such as PVC pipes․ When activated, the coils rotate, pushing the item forward until it drops into the dispensing slot․ This mechanism is often controlled by servos or manual triggers, ensuring precise and efficient product release․ The simplicity of this design makes it accessible for DIY projects, allowing creators to customize the dispensing process according to the size and type of products being vended․ By combining basic materials with creative engineering, the dispensing mechanism becomes a cornerstone of a functional manual vending machine․
Payment and Selection System
The payment and selection system in a manual vending machine is designed to allow users to choose and purchase items easily․ This system typically involves a selection interface, such as buttons or a keypad, and a payment method, which can be manual or automated․ Sensors detect the user’s selection and trigger the dispensing mechanism․ In DIY projects, Arduino boards are often used to process inputs and outputs, ensuring smooth operation․ The system can be customized to accept coins, bills, or even digital payments, depending on the complexity of the build․ This component is crucial for user interaction and ensures the machine functions as intended, making it both functional and user-friendly․
Sensors and Automation in Manual Machines
Sensors play a crucial role in manual vending machines, enabling automation and efficient operation․ Infrared sensors are commonly used to detect product levels and trigger dispensing mechanisms․ These sensors ensure items are released correctly and prevent jams․ Automation is achieved through microcontrollers like Arduino, which process inputs from buttons or keypads and control servos or motors․ DIY projects often incorporate spiral mechanisms made from aluminum wire, manually shaped to dispense products․ Sensors also help in detecting user selections and confirming transactions, making the machine interactive and user-friendly․ While manual in design, these machines leverage automation to enhance functionality, offering a blend of simplicity and innovation for DIY enthusiasts and creators․

Step-by-Step Assembly Guide
Building a manual vending machine involves cutting and assembling the frame, integrating mechanical and electronic components, and testing the dispensing mechanism to ensure smooth operation․
Cutting and Assembling the Frame
Cutting and assembling the frame is the foundational step in building a manual vending machine․ Start by selecting durable materials like MDF or sturdy cardboard, ensuring they align with your design․ Use manual tools such as a table saw, hand drill, or jigsaw to precisely cut the panels according to your measurements․ Sand the edges for smoothness and safety․ Assemble the frame using screws, glue, or bolts, ensuring stability and alignment․ For a desktop-sized machine, keep the dimensions compact yet functional․ Properly align the panels to form the base, sides, and top․ This structure will house the dispensing mechanism, payment system, and electronics․ Ensure the frame is sturdy to support the weight of the products and components․ Safety and precision are key during this phase to guarantee a reliable and functional machine․
Integrating Mechanical and Electronic Parts
Integrating mechanical and electronic parts is a critical step in building a functional manual vending machine․ Start by connecting the servos and springs to the Arduino microcontroller, ensuring they are properly aligned with the dispensing mechanism․ Use sensors to detect product levels and monitor user selections․ Wire the components carefully, following a circuit diagram to avoid short circuits․ Test each part individually before integrating them into the machine․ For example, verify that the servos rotate correctly and the sensors detect inputs accurately․ Once everything is connected, use a breadboard to temporarily test the setup․ Finally, write and upload the Arduino code to control the dispensing and selection processes․ Proper integration ensures smooth operation and automation of the vending machine․
Final Assembly and Testing
Final assembly and testing are the last steps before your manual vending machine is ready for use․ Begin by assembling all structural components, ensuring the frame is sturdy and secure․ Next, install the mechanical and electronic parts, such as servos, sensors, and the Arduino board, into their designated positions․ Connect the power supply and test each function individually, like the dispensing mechanism and payment system․ Once everything is integrated, load the machine with products and test user interactions, such as selecting items and dispensing them․ Check for any issues, like jams or incorrect dispensing, and make necessary adjustments․ Finally, ensure the machine operates smoothly and reliably before declaring it complete․ This step ensures your DIY vending machine is functional, efficient, and ready for everyday use․
Programming and Automation
Programming and automation bring your manual vending machine to life․ Using Arduino, you can code the machine to dispense items, manage selections, and automate operations seamlessly․
Arduino, a versatile microcontroller, is widely used in DIY vending machine projects to automate operations․ It simplifies the process of controlling mechanical components like servos and sensors, enabling precise item dispensing․ By programming Arduino, you can create logic for user input, selection validation, and inventory management․ This platform is ideal for beginners due to its user-friendly interface and extensive community support․ With Arduino, you can integrate advanced features such as coin detection, stock tracking, and even remote monitoring․ Learning Arduino basics is essential for customizing your vending machine’s functionality and ensuring smooth, efficient performance․ Start by understanding the fundamentals of coding and hardware integration to unlock the full potential of your manual vending machine project․

Writing the Code for Dispensing and Selection
Writing the code for a manual vending machine involves creating logic to handle user input, selection validation, and item dispensing․ Start by defining functions to read button presses or keypad inputs, which correspond to product selections․ Use conditional statements to validate choices and ensure the selected item is in stock․ Once validated, trigger the dispensing mechanism, such as activating a servo motor to release the product․ Include feedback mechanisms, like LED indicators or sound alerts, to notify the user of successful or failed transactions․ Don’t forget to handle edge cases, such as invalid selections or out-of-stock items․ Use sensors to monitor product levels and update the system accordingly․ Testing and refining the code ensures smooth operation and a seamless user experience․
Customizing the Machine’s Functionality
Customizing a manual vending machine allows you to tailor its features to suit specific needs or preferences․ You can add multiple product slots, each controlled by separate servos, enabling the machine to dispense a variety of items․ Enhance user interaction by incorporating a keypad or buttons for selection and an LCD screen for displaying product information․ For advanced customization, integrate sensors to monitor stock levels and provide real-time updates․ You can also program the machine to accept different payment methods or implement a refund system․ Additionally, personalize the exterior with paint, decals, or custom designs to make it visually unique․ By modifying the code and adding new components, the machine’s functionality can be expanded to meet creative or practical requirements, making it a versatile and engaging project․

Maintenance and Troubleshooting
Regular maintenance ensures smooth operation․ Clean the dispensing mechanism, check sensors, and lubricate moving parts․ Address common issues like jams or sensor malfunctions promptly to prevent downtime․
Regular Maintenance Tips
Regular maintenance is crucial for ensuring your manual vending machine operates smoothly․ Start by cleaning the dispensing mechanism to prevent jams and ensure items drop correctly․ Check and lubricate moving parts, such as servos or springs, to maintain their efficiency․ Inspect sensors and wires for damage or wear, as these are critical for automation․ Test the machine periodically to identify and address potential issues early․ Additionally, ensure the product inventory is well-stocked and organized to avoid misalignment․ By following these tips, you can extend the machine’s lifespan and ensure reliable performance․ Consistent upkeep also helps prevent unexpected breakdowns, keeping your DIY project functional and user-friendly․
Common Issues and Solutions
When building or operating a manual vending machine, several common issues may arise․ One frequent problem is item dispensing failure, often caused by misaligned coils or bent wires․ To fix this, ensure the dispensing mechanism is properly calibrated and manually adjust the coils if necessary․ Another issue is sensor malfunctions, which can prevent accurate product detection․ Cleaning the sensors or using duct tape to isolate the infrared receiver, as suggested in some DIY solutions, can resolve this․ Additionally, mechanical jams due to overstocking or improper item placement are common․ Regularly testing the machine and ensuring products are aligned correctly can prevent such issues․ Addressing these problems promptly ensures smooth operation and user satisfaction․
Upgrading and Modifying the Machine
Upgrading a manual vending machine allows for enhanced functionality and customization․ One popular modification is integrating an Arduino microcontroller to automate dispensing and selection processes․ Adding sensors, such as infrared or ultrasonic sensors, can improve item detection and reduce mechanical failures․ Another upgrade is incorporating a user-friendly interface, like a keypad or LCD screen, for easier operation․ DIY enthusiasts often experiment with 3D-printed parts to create complex dispensing mechanisms or aesthetic designs․ Additionally, modifying the machine to accept digital payments or adding LED lighting for visual appeal can make it more modern and convenient․ These upgrades not only extend the machine’s capabilities but also provide a rewarding challenge for creators looking to push their project to the next level․
Building a manual vending machine is a rewarding DIY project that fosters creativity and problem-solving skills․ It offers a sense of accomplishment and inspires future innovations․
Final Thoughts on Building a Manual Vending Machine
Building a manual vending machine is a highly rewarding DIY project that sparks creativity and teaches valuable skills․ It allows you to understand the mechanics of automation while creating something functional and fun․ The process fosters problem-solving and hands-on learning, making it an excellent educational tool․ Seeing your machine dispense items for the first time is incredibly satisfying, giving you a sense of accomplishment․ This project also encourages innovation, as you can customize and improve your design over time․ Whether for personal use or as a gift, a manual vending machine is a unique and engaging creation that combines practicality with enjoyment․
Potential Applications and Future Projects
A manual vending machine can serve as a creative tool for small businesses, events, or even educational settings․ It offers a unique way to dispense products while teaching mechanics and automation principles․ Future projects could involve integrating smart technology, such as mobile payment systems or inventory tracking, to enhance functionality․ Customization options, like themed designs or specialized product dispensing, could also expand its appeal․ Additionally, the machine can be scaled up or modified for different purposes, making it a versatile DIY endeavor․ With endless possibilities for innovation, a manual vending machine is not just a fun project but also a gateway to exploring advanced engineering and design concepts․