Congratulations on purchasing the Tasco 8MP Trail Camera! This rugged, weatherproof device captures stunning images and videos․ This manual guides you through setup, features, and troubleshooting for optimal performance․

Congratulations on Your Purchase
Congratulations on acquiring the Tasco Trail Camera, a high-quality device designed for capturing wildlife activity․ With its weatherproof and rugged construction, it’s perfect for outdoor use․ This camera offers still image and video modes, ensuring you never miss a moment․ Refer to this manual for setup, troubleshooting, and tips to maximize its performance․ Proper installation of batteries and an SD card is essential for optimal functionality․ Explore the advanced features and settings to tailor the camera to your needs, ensuring the best results in various environments and conditions․

Key Features of the Tasco Trail Camera
The Tasco Trail Camera is an 8MP device designed for capturing high-quality images and videos of wildlife․ It features a weatherproof and rugged construction, making it ideal for outdoor use․ The camera supports both still image and video modes, ensuring versatility in capturing moments․ With its user-friendly interface and durable design, it’s perfect for monitoring animal activity․ The camera’s weatherproofing ensures reliability in various environmental conditions, while its compact size allows for discreet placement․ Refer to this manual for detailed guidance on maximizing its performance and troubleshooting common issues․
Purpose of the Manual
This manual is designed to provide comprehensive guidance for setting up, operating, and maintaining your Tasco Trail Camera․ It covers essential steps for installation, configuration, and troubleshooting to ensure optimal performance․ The manual is intended to help users maximize the camera’s capabilities, whether for wildlife monitoring or outdoor surveillance․ By following the instructions, you can resolve common issues, understand key features, and make the most of your device․ This guide is structured to be user-friendly, offering clear and concise information for both new and experienced users to achieve the best results with their Tasco Trail Camera․

System Requirements
The Tasco Trail Camera requires 4-8 AA batteries and a Class 10 SD card (up to 32GB) for optimal performance and storage capabilities․

Compatible Batteries
Your Tasco Trail Camera requires 4-8 AA batteries for operation․ For optimal performance, use high-quality alkaline or lithium batteries, as they provide longer battery life and better durability․ Avoid mixing old and new batteries or different battery types, as this can reduce performance․ Nickel-metal hydride (NiMH) rechargeable batteries are also compatible and offer an eco-friendly option․ Always ensure batteries are inserted correctly, following the polarity markings․ Remove batteries during extended storage to prevent leakage․ Refer to the manual for specific recommendations and guidelines to maximize your camera’s efficiency and lifespan․
SD Card Specifications
Your Tasco Trail Camera requires an SD card to store images and videos․ Use a high-quality SD, SDHC, or SDXC card with a capacity of up to 32GB for optimal performance․ Ensure the card is formatted in the camera before use for proper functionality․ Avoid using cards from other devices to prevent potential issues․ The camera supports standard file formats, ensuring compatibility with most computers and viewing software․ Always check the card’s remaining storage to avoid missing important captures․ Refer to the manual for specific recommendations on card selection and maintenance․
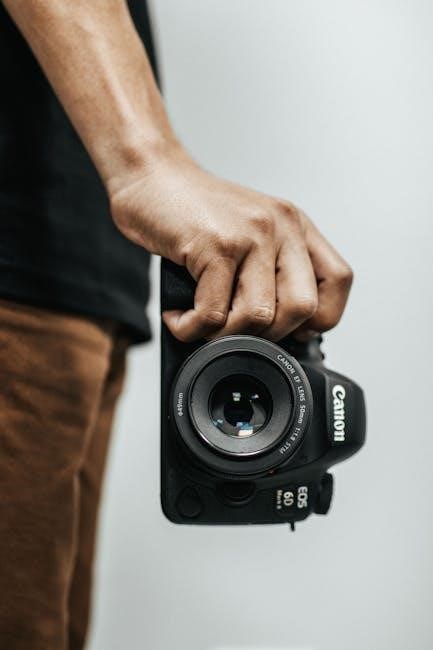
Installing Batteries and SD Card
Insert 4-8 AA batteries into the battery compartment, ensuring correct polarity․ Securely place the SD card into the slot until it clicks․ The camera is now ready for use․
Step-by-Step Battery Installation
Open the battery compartment located on the bottom of the camera․
Insert 4-8 AA batteries, ensuring the positive (+) and negative (-) terminals face the correct direction․
Close the compartment securely to avoid moisture entry․
Power on the camera to confirm proper installation․
For optimal performance, use high-quality alkaline or lithium batteries․ Avoid mixing old and new batteries to prevent power issues․
Inserting the SD Card
Locate the SD card slot on the camera’s side or bottom․
Open the compartment by sliding or lifting the cover․
Insert the SD card with the label facing up and the metal contacts down․
Gently push until it clicks into place․
Close the compartment securely․
Ensure the SD card is compatible (Class 10, 8-128GB) for optimal performance․ Format the card in the camera if prompted․ Handle the card by the edges to avoid damage․

Mounting the Camera
Mount the camera on a sturdy tree with a diameter of about 6 inches․ Place it 16-17 feet from the subject area and 2․5-3․5 feet high for optimal coverage․ Ensure the camera is level and securely fastened to avoid movement or damage․ Choose a location with clear visibility and minimal obstructions for best results․ Always follow safety precautions when installing the camera in the field․ This setup ensures reliable performance and captures high-quality images or videos effectively․ Proper mounting is crucial for motion detection and image clarity․ Position the camera to face north to reduce glare from sunlight․ Use the provided mounting strap or bracket to secure the device firmly․ Avoid loose installations to prevent camera shake or accidental displacement․ Test the camera’s position by triggering the motion sensor to ensure it captures the desired area․ Adjust the angle if necessary to cover the target zone adequately․ Make sure the camera is tightly fastened to withstand weather conditions and wildlife activity․ Regularly inspect the mounting to ensure stability and reliability over time․ This will help maintain consistent performance and extend the camera’s lifespan․ By following these guidelines, you can ensure your Tasco Trail Camera operates efficiently and delivers exceptional results․ Always prioritize stability and visibility when selecting a mounting location․ This will enhance the overall functionality and durability of your trail camera․ Remember to check local regulations before installing the camera in certain areas․ Ensure the camera does not infringe on private property or protected zones; Use the mounting hardware provided to avoid damaging the camera or the tree․ If necessary, consult additional resources or guides for advanced mounting techniques․ Proper installation is key to maximizing the camera’s potential and enjoying a seamless user experience․ Keep the camera at an appropriate height to capture the best possible images or videos․ Avoid mounting it too high or too low, as this can affect image quality․ Use a level tool to ensure the camera is perfectly horizontal․ This will prevent tilted images and ensure accurate captures․ Always handle the camera with care during the mounting process to avoid damage․ Test the camera’s functionality after installation to ensure everything works correctly․ Make adjustments as needed to achieve the desired performance․ By carefully following these mounting guidelines, you can optimize your Tasco Trail Camera’s effectiveness and enjoy reliable results․ Proper mounting is essential for capturing high-quality images and videos in various outdoor conditions․ Ensure the camera is securely fastened to withstand environmental factors like wind and rain․ Choose a location that provides the best vantage point for your specific needs․ Whether for wildlife monitoring or property surveillance, correct mounting ensures superior performance․ Always refer to the manual for specific mounting recommendations tailored to your Tasco Trail Camera model․ This will help you achieve the best possible results and extend the camera’s service life․ Remember to periodically inspect and maintain the mounting setup to ensure ongoing reliability․ This attention to detail will enhance your overall experience with the Tasco Trail Camera․ Mounting the camera correctly is the first step toward capturing stunning images and videos in the great outdoors․ Ensure the camera is level, secure, and positioned for optimal coverage․ Avoid common mistakes like loose mounting or incorrect placement, which can compromise image quality․ Use the provided mounting accessories to ensure a stable and durable installation․ Test the camera’s position by triggering the motion sensor to confirm it captures the desired area․ Adjust the angle or location as needed for better results․ Proper mounting is crucial for the camera’s performance and longevity․ Always follow the manufacturer’s guidelines for the best outcome․ This will help you get the most out of your Tasco Trail Camera and enjoy a satisfying user experience․ Mounting the camera correctly ensures it captures high-quality images and videos consistently․ Choose a sturdy tree or post and position the camera at the recommended height and distance․ Use the mounting strap or bracket to secure the camera firmly․ Ensure the camera is level and facing the desired direction․ Avoid mounting it in areas with heavy foliage or obstructions․ Test the camera’s functionality after installation to ensure it works properly․ Make any necessary adjustments to improve image quality or coverage․ Proper mounting is essential for reliable performance and capturing the best possible images or videos․ Always follow the manufacturer’s recommendations for mounting your Tasco Trail Camera․ This will help you achieve optimal results and extend the camera’s lifespan․ Remember to check the camera’s position periodically to ensure it remains secure and functional․ Adjustments may be needed over time due to environmental changes or equipment wear․ By carefully mounting your Tasco Trail Camera, you can enjoy a seamless and effective monitoring experience․ Proper installation is key to maximizing the camera’s potential and capturing high-quality images or videos․ Always prioritize stability and visibility when selecting a mounting location․ This will enhance the overall functionality and durability of your trail camera․ Remember to check local regulations before installing the camera in certain areas․ Ensure the camera does not infringe on private property or protected zones․ Use the mounting hardware provided to avoid damaging the camera or the tree․ If necessary, consult additional resources or guides for advanced mounting techniques․ Proper installation is key to maximizing the camera’s potential and enjoying a seamless user experience․ Keep the camera at an appropriate height to capture the best possible images or videos․ Avoid mounting it too high or too low, as this can affect image quality․ Use a level tool to ensure the camera is perfectly horizontal․ This will prevent tilted images and ensure accurate captures․ Always handle the camera with care during the mounting process to avoid damage․ Test the camera’s functionality after installation to ensure everything works correctly․ Make adjustments as needed to achieve the desired performance․ By carefully following these mounting guidelines, you can optimize your Tasco Trail Camera’s effectiveness and enjoy reliable results․ Proper mounting is essential for capturing high-quality images and videos in various outdoor conditions․ Ensure the camera is securely fastened to withstand environmental factors like wind and rain․ Choose a location that provides the best vantage point for your specific needs․ Whether for wildlife monitoring or property surveillance, correct mounting ensures superior performance․ Always refer to the manual for specific mounting recommendations tailored to your Tasco Trail Camera model․ This will help you achieve the best possible results and extend the camera’s service life․ Remember to periodically inspect and maintain the mounting setup to ensure ongoing reliability․ This attention to detail will enhance your overall experience with the Tasco Trail Camera․ Mounting the camera correctly is the first step toward capturing stunning images and videos in the great outdoors․ Ensure the camera is level, secure, and positioned for optimal coverage․ Avoid common mistakes like loose mounting or incorrect placement, which can compromise image quality․ Use the provided mounting accessories to ensure a stable and durable installation․ Test the camera’s position by triggering the motion sensor to confirm it captures the desired area․ Adjust the angle or location as needed for better results․ Proper mounting is crucial for the camera’s performance and longevity․ Always follow the manufacturer’s guidelines for the best outcome․ This will help you get the most out of your Tasco Trail Camera and enjoy a satisfying user experience․ Mounting the camera correctly ensures it captures high-quality images and videos consistently․ Choose a sturdy tree or post and position the camera at the recommended height and distance․ Use the mounting strap or bracket to secure the camera firmly․ Ensure the camera is level and facing the desired direction․ Avoid mounting it in areas with heavy foliage or obstructions․ Test the camera’s functionality after installation to ensure it works properly․ Make any necessary adjustments to improve image quality or coverage․ Proper mounting is essential for reliable performance and capturing the best possible images or videos․ Always follow the manufacturer’s recommendations for mounting your Tasco Trail Camera․ This will help you achieve optimal results and extend the camera’s lifespan․ Remember to check the camera’s position periodically to ensure it remains secure and functional․ Adjustments may be needed over time due to environmental changes or equipment wear․ By carefully mounting your Tasco Trail Camera, you can enjoy a seamless and effective monitoring experience․ Proper installation is key to maximizing the camera’s potential and capturing high-quality images or videos․ Always prioritize stability and visibility when selecting a mounting location․ This will enhance the overall functionality and durability of your trail camera․ Remember to check local regulations before installing the camera in certain areas․ Ensure the camera does not infringe on private property or protected zones․ Use the mounting hardware provided to avoid damaging the camera or the tree․ If necessary, consult additional resources or guides for advanced mounting techniques․ Proper installation is key to maximizing the camera’s potential and enjoying a seamless user experience․ Keep the camera at an appropriate height to capture the best possible images or videos․ Avoid mounting it too high or too low, as this can affect image quality․ Use a level tool to ensure the camera is perfectly horizontal․ This will prevent tilted images and ensure accurate captures․ Always handle the camera with care during the mounting process to avoid damage․ Test the camera’s functionality after installation to ensure everything works correctly․ Make adjustments as needed to achieve the desired performance․ By carefully following these mounting guidelines, you can optimize your Tasco Trail Camera’s effectiveness and enjoy reliable results․ Proper mounting
Choosing the Right Location

Choosing the right location for your Tasco Trail Camera is crucial for optimal performance․ Select a spot with clear visibility and minimal obstructions․ Mount the camera 16-17 feet away from the subject area and 2․5-3․5 feet high․ Ensure the camera faces north to reduce glare from sunlight․ Avoid areas with heavy foliage or obstructions that could block the view․ Test the camera’s position by triggering the motion sensor to confirm it captures the desired area․ Adjust the angle or location as needed for better coverage․ Always ensure the camera is securely fastened to a sturdy tree or post to withstand weather conditions․ Check local regulations to avoid placing the camera on private property or protected zones․ Proper placement ensures reliable performance and high-quality images or videos․ By carefully selecting the location, you can maximize the camera’s potential and enjoy a seamless monitoring experience․ Always prioritize visibility and stability when choosing a location for your Tasco Trail Camera․ This will enhance the overall functionality and durability of your device․ Remember to test the camera’s position before finalizing the installation․ Adjustments may be needed to achieve the best possible results․ By following these guidelines, you can ensure your Tasco Trail Camera operates effectively and delivers exceptional performance․ Proper location selection is key to capturing high-quality images or videos consistently․ Avoid common mistakes like poor visibility or incorrect placement, which can compromise image quality․ Use the provided mounting accessories to ensure a stable and durable installation․ Test the camera’s functionality after installation to ensure it works properly․ Make any necessary adjustments to improve image quality or coverage․ By carefully choosing the right location, you can optimize your Tasco Trail Camera’s effectiveness and enjoy reliable results․ Always refer to the manual for specific recommendations tailored to your Tasco Trail Camera model․ This will help you achieve the best possible results and extend the camera’s service life․ Remember to periodically inspect and maintain the camera’s position to ensure ongoing reliability․ This attention to detail will enhance your overall experience with the Tasco Trail Camera․ Choosing the right location is the first step toward capturing stunning images and videos in the great outdoors․ Ensure the camera is positioned for optimal coverage and stability․ Avoid common mistakes like loose mounting or incorrect placement, which can compromise image quality․ Use the provided mounting accessories to ensure a stable and durable installation․ Test the camera’s position by triggering the motion sensor to confirm it captures the desired area․ Adjust the angle or location as needed for better results․ Proper placement is crucial for the camera’s performance and longevity․ Always follow the manufacturer’s guidelines for the best outcome․ This will help you get the most out of your Tasco Trail Camera and enjoy a satisfying user experience․ Choosing the right location ensures your Tasco Trail Camera captures high-quality images and videos consistently․ Select a sturdy tree or post and position the camera at the recommended height and distance․ Use the mounting strap or bracket to secure the camera firmly․ Ensure the camera is level and facing the desired direction․ Avoid mounting it in areas with heavy foliage or obstructions․ Test the camera’s functionality after installation to ensure it works properly․ Make any necessary adjustments to improve image quality or coverage․ Proper placement is essential for reliable performance and capturing the best possible images or videos․ Always follow the manufacturer’s recommendations for your Tasco Trail Camera․ This will help you achieve optimal results and extend the camera’s lifespan․ Remember to check the camera’s position periodically to ensure it remains secure and functional․ Adjustments may be needed over time due to environmental changes or equipment wear․ By carefully choosing the right location, you can enjoy a seamless and effective monitoring experience․ Proper placement is key to maximizing the camera’s potential and capturing high-quality images or videos․ Always prioritize visibility and stability when selecting a location for your Tasco Trail Camera․ This will enhance the overall functionality and durability of your trail camera․ Remember to check local regulations before installing the camera in certain areas․ Ensure the camera does not infringe on private property or protected zones․ Use the mounting hardware provided to avoid damaging the camera or the tree․ If necessary, consult additional resources or guides for advanced mounting techniques․ Proper placement is key to maximizing the camera’s potential and enjoying a seamless user experience․ Keep the camera at an appropriate height to capture the best possible images or videos․ Avoid mounting it too high or too low, as this can affect image quality․ Use a level tool to ensure the camera is perfectly horizontal․ This will prevent tilted images and ensure accurate captures․ Always handle the camera with care during the placement process to avoid damage․ Test the camera’s functionality after installation to ensure everything works correctly․ Make adjustments as needed to achieve the desired performance․ By carefully following these placement guidelines, you can optimize your Tasco Trail Camera’s effectiveness and enjoy reliable results․ Proper placement is essential for capturing high-quality images and videos in various outdoor conditions․ Ensure the camera is securely fastened to withstand environmental factors like wind and rain․ Choose a location that provides the best vantage point for your specific needs․ Whether for wildlife monitoring or property surveillance, correct placement ensures superior performance․ Always refer to the manual for specific recommendations tailored to your Tasco Trail Camera model․ This will help you achieve the best possible results and extend the camera’s service life․ Remember to periodically inspect and maintain the placement setup to ensure ongoing reliability; This attention to detail will enhance your overall experience with the Tasco Trail Camera․ Choosing the right location is the first step toward capturing stunning images and videos in the great outdoors․ Ensure the camera is positioned for optimal coverage and stability․ Avoid common mistakes like poor visibility or incorrect placement, which can compromise image quality․ Use the provided mounting accessories to ensure a stable and durable installation․ Test the camera’s position by triggering the motion sensor to confirm it captures the desired area․ Adjust the angle or location as needed for better results․ Proper placement is crucial for the camera’s performance and longevity․ Always follow the manufacturer’s guidelines for the best outcome․ This will help you get the most out of your Tasco Trail Camera and enjoy a satisfying user experience․ Choosing the right location ensures your Tasco Trail Camera captures high-quality images and videos consistently․ Select a sturdy tree or post and position the camera at the recommended height and distance․ Use the mounting strap or bracket to secure the camera firmly․ Ensure the camera is level and facing the desired direction․ Avoid mounting it in areas with heavy foliage or obstructions․ Test the camera’s functionality after installation to ensure it works properly․ Make any necessary adjustments to improve image quality or coverage; Proper placement is essential for reliable performance and capturing the best possible images or videos․ Always follow the manufacturer’s recommendations for your Tasco Trail Camera․ This will help you achieve optimal results and extend the camera’s lifespan․ Remember to check the camera’s position periodically to ensure it remains secure and functional․ Adjustments may be needed over time due to environmental changes or equipment wear․ By carefully choosing the right location, you can enjoy a seamless and effective monitoring experience․ Proper placement is key to maximizing the camera’s potential and capturing high-quality images or videos․ Always prioritize visibility and stability when selecting
Congratulations on completing the Tasco Trail Camera setup! By following this manual, you’re ready to capture stunning images and videos․ Happy monitoring and enjoy your outdoor adventures!